Installation
Mounting the EZtrack hub
The Hub itself is mounted on the camera using a V-lock mount or a custom rig using 1/4'' screws.
Video Tutorial : EZtrack lighthouse setup
Connections
The hub offers the following ports. To access the web application, at least the 12V power and network have to be connected.
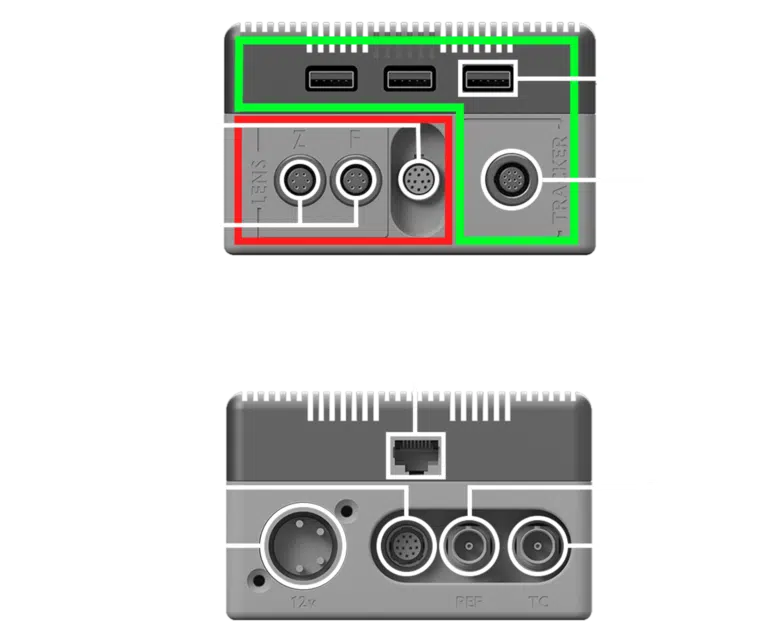
USB: Most tracking systems send data to the hub using a USB-A interface.
LEMO: The SWAN tracker uses a 10-pin LEMO port instead of a USB port.
Zoom/Focus encoders: Compatible external rotary encoders use 6-pin LEMO ports.
Digital Lens: Lenses with integrated encoders can directly send metadata on this Hirose port.
Network: The hub is connected to the studio tracking network via a RJ45 port.
Genlock: Blackburst or Tri-Level sync has to be provided via SDI.
Timecode: VITC or LTC Timecode can be provided via SDI.
12V Power: 4-pin XLR. Can be taken from a transformer, or a camera/battery using a D-tap adapter.
Update Port: Used for factory configuration and repairs only.
Tip
The hub offers 3 USB connectors. While this is more than enough for most usage, it is possible to use a USB splitter on top to add more trackers.
Don't overdo it though, as all devices will have to share the reading speed of a single USB port.
Warning
If using both genlock and timecode at the same time, they should come from the same source to be synchronized between themselves.
Video Tutorial : EZtrack lighthouse connections
Typical Setup
The following diagram shows the standard wiring for a Lighthouse/Antilatency setup:
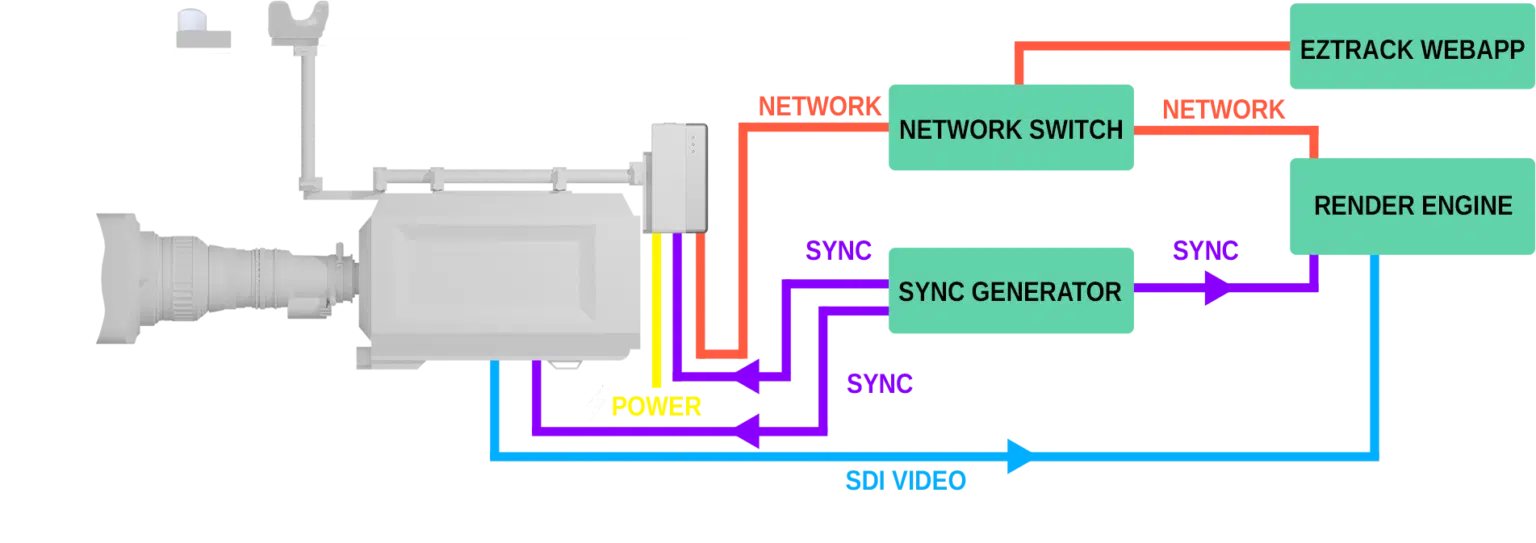
If there are multiple local networks in the studio, note that the render engine and EZtrack have to be connected to a common network to exchange tracking data.
Both for genlock and timecode, the source should be the same for all equipment in the studio.