Lighthouse Tracking Setup
1. Base Stations Guidelines
You can use up to four base stations in a single room covering a maximum surface of 10 m x 10 m (33 ft x 33 ft), we recommend 8 m x 8 m to keep a safe area.
Each base station has a 160-degree horizontal field of view and a 115-degree vertical field of view.

Install the base stations around your tracking area so that their fields of view covers all of it.
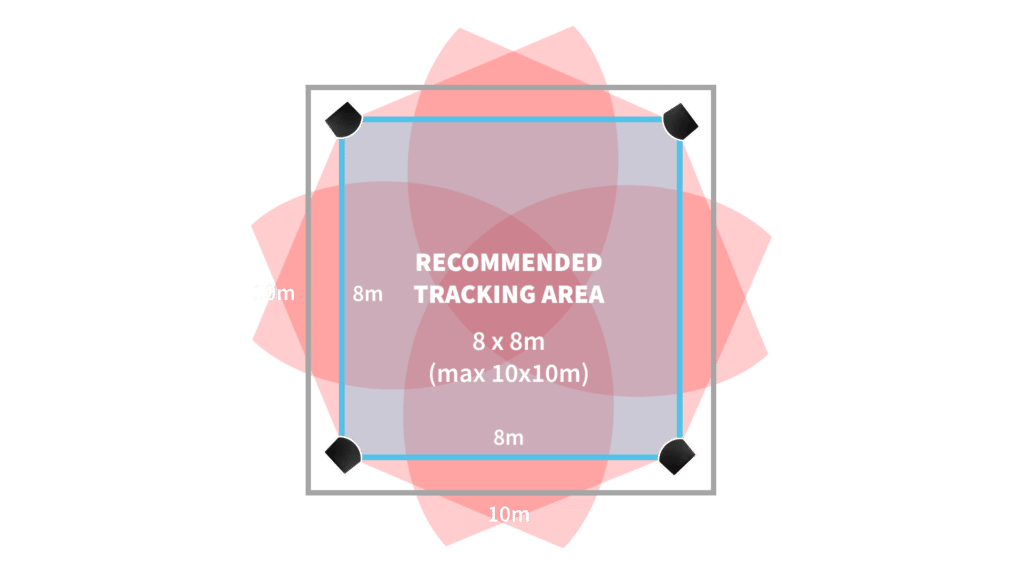
For proper tracking, make sure that the distance between any base station and the trackers are within a range of 7 m (23 ft). Make sure that there are no physical barriers (such as lighting rigs, props, ...) where you place the base stations, so it can fully cover its field of view and its signal won’t be obstructed.
Detailed Page: Setting up the base stations
2. Lighthouse Trackers
They have a power button on top, in the middle. There is a USB-C port at the back to connect the tracker to EZtrack or a charger. The front axis of the tracker is the side opposite of the USB-C port.
Detailed Page: Understanding the lighthouse trackers
3. EZtrack Setup
3.1. Attach a tracker to the camera plate
Align the tripod plate’s bolt and stabilizing pin with the corresponding holes on the Tracker. Turn the tab on the bottom side of the plate clockwise to screw the Tracker securely in place.
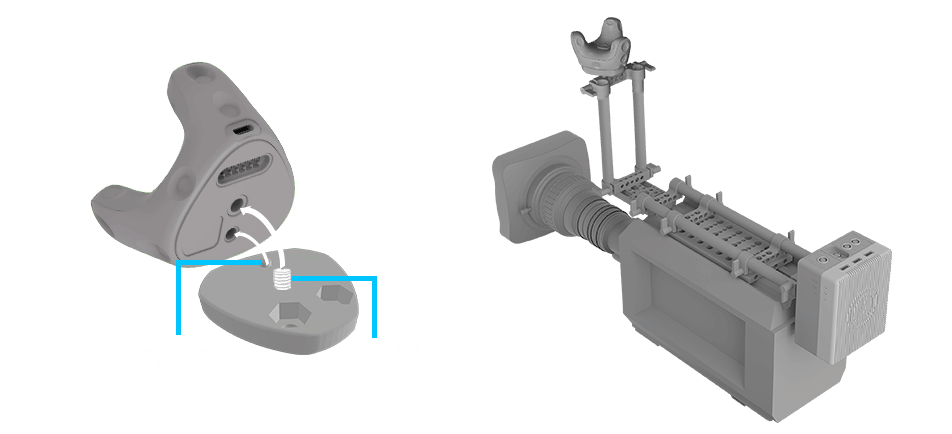
3.2. Attach a tracker to the tripod
Simply rotate the tripod's top screw inside a tracker's thread. Deploy the legs of the tripod so it sits firmly on the ground.
This tracker will be used to define the studio referential.
3.3. EZtrack Configuration
Follow the instructions in Setting up Lighthouse tracking in EZtrack