Export for Vizrt (1.3 feature)
1. Put lens profile in folder
Drop the lens profile generated by ezprofile in the lens profile folder in the Vizrt ProgramData folder. Note that the naming of the file is important, Viz Tracking Hub will reject the file if the naming is not what it expects.
2. Setup Viz Tracking Hub
2.1. Layout
Use the latest version of Viz Tracking Hub. In the rigs, before adding the Camera, create a Lens File node with the plus icon on the right side of "Rigs", then while it is selected, press the same button and select "add child > Camera". This will create a camera rig parented to the lens. You can create more complicated setups, but the Vizrt documentation states that the lens node should always be on top of the hierarchy.
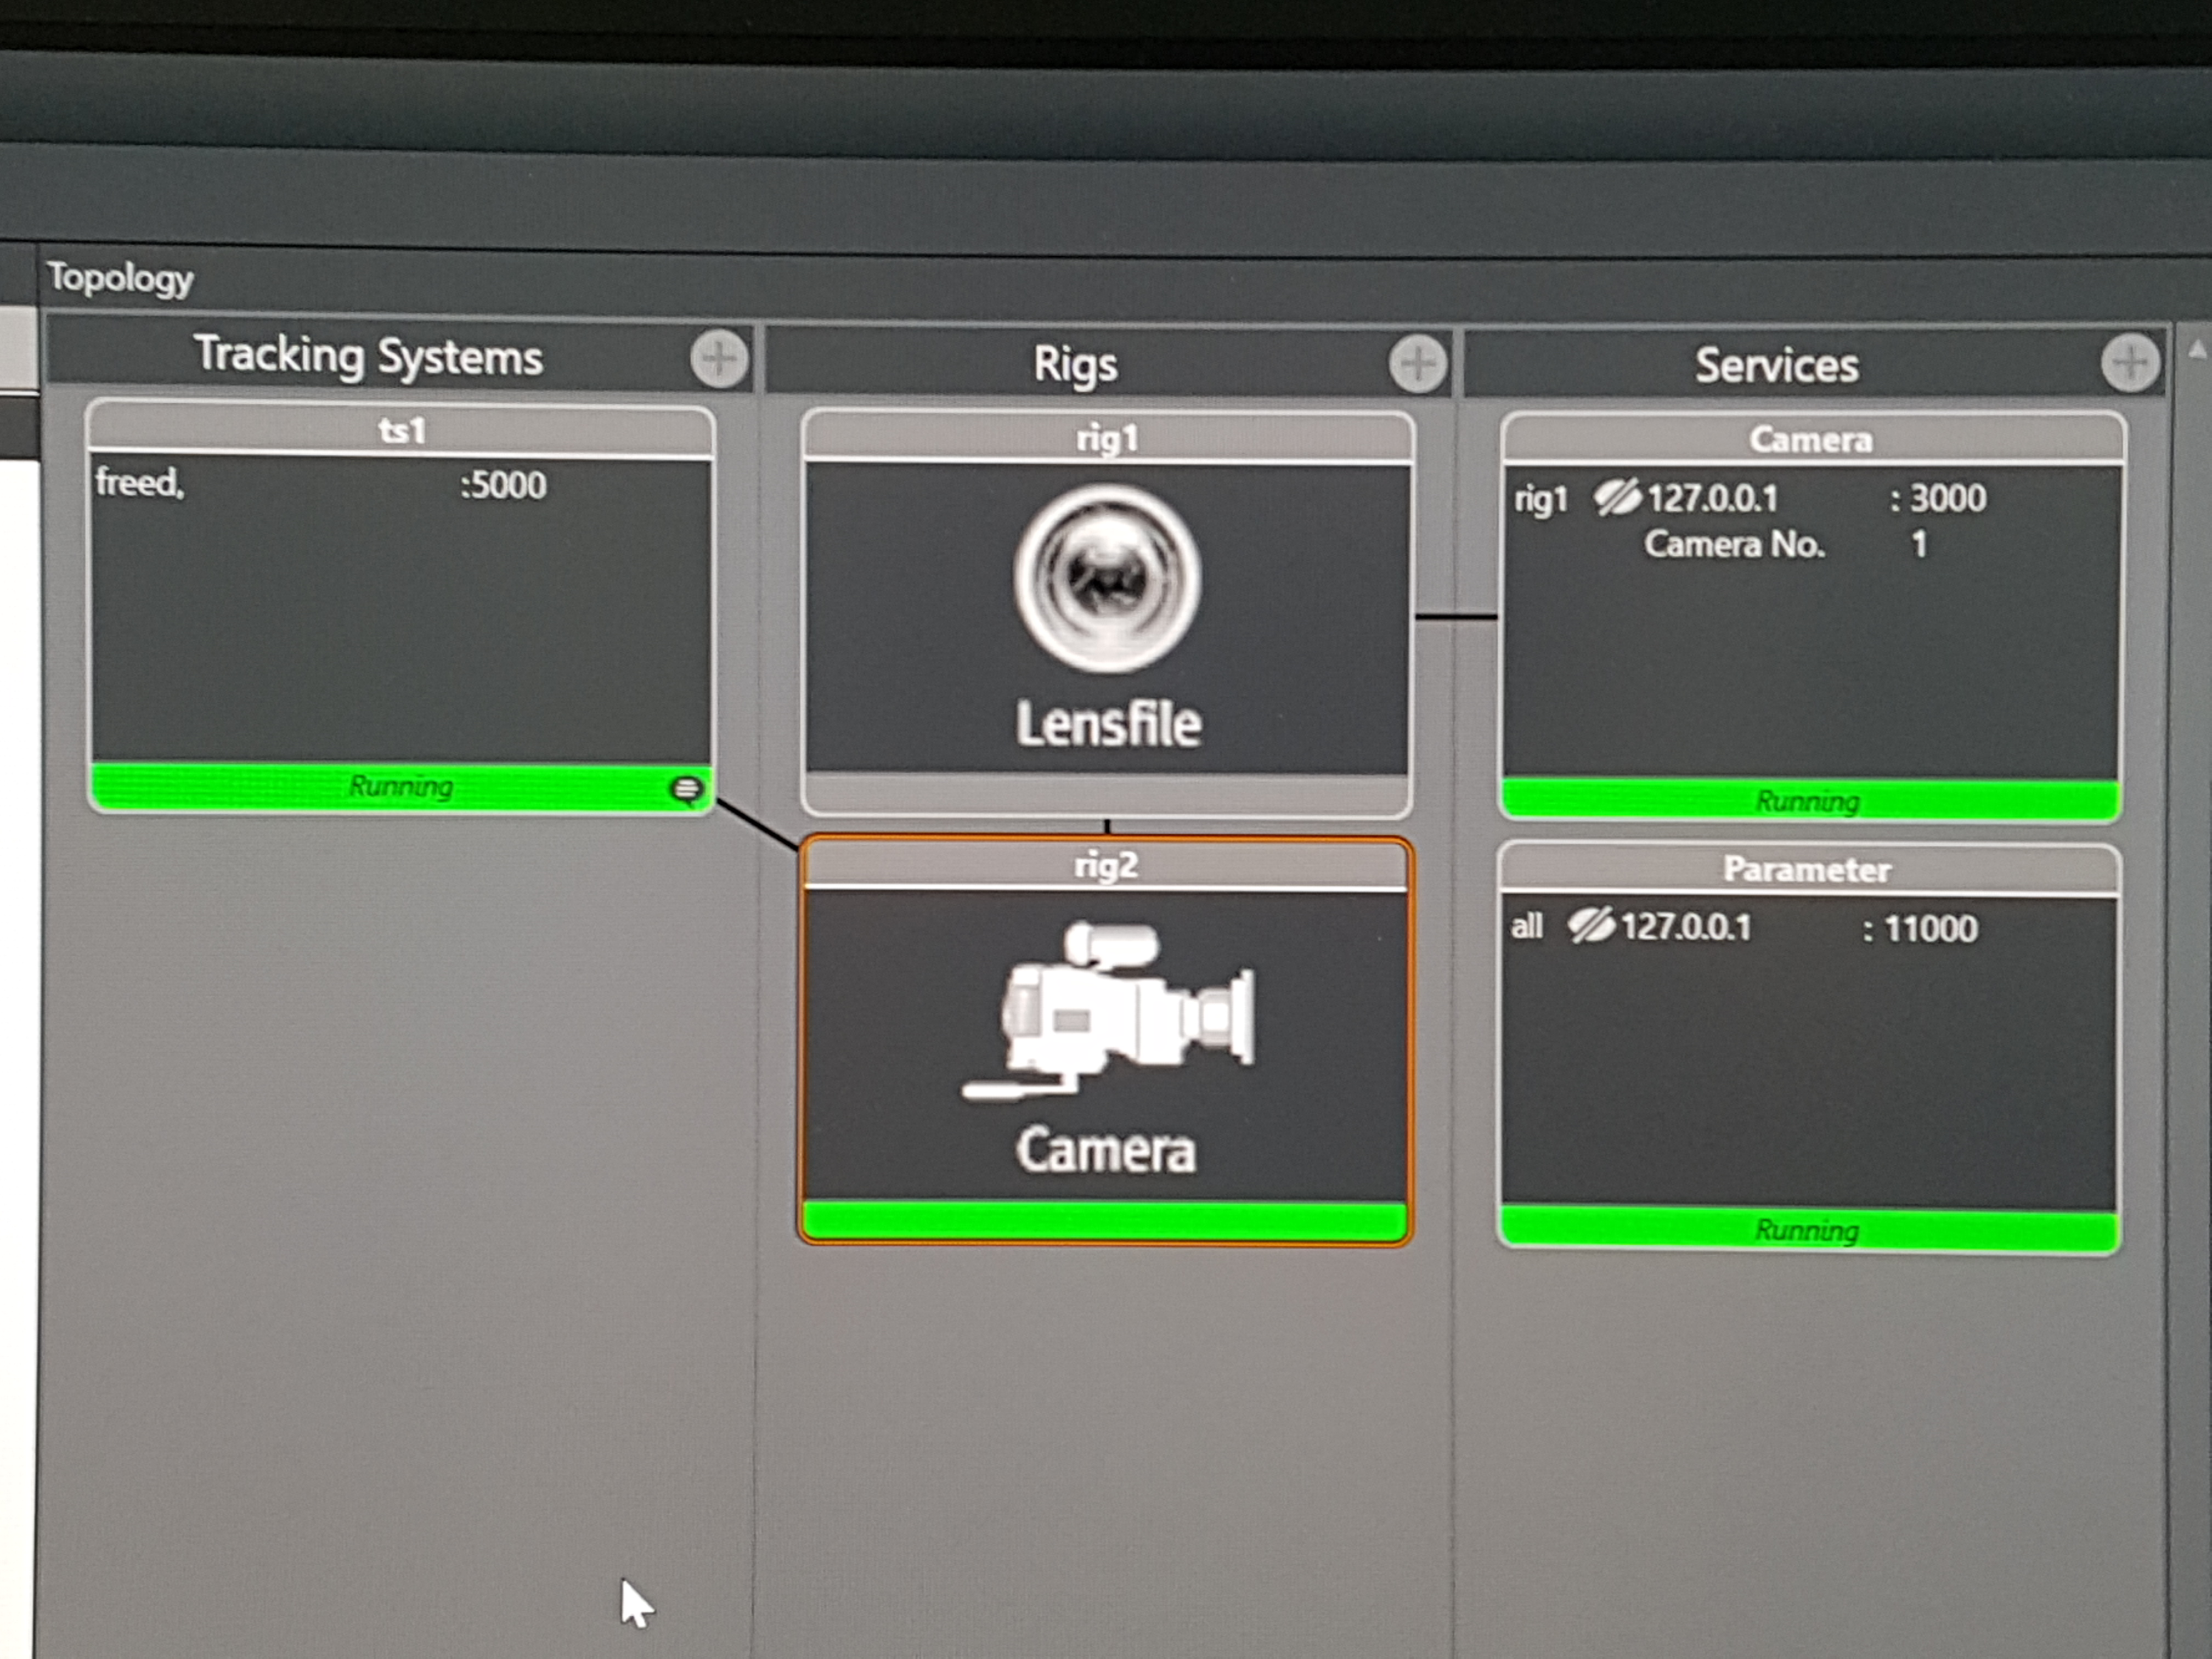
2.2. Link camera to tracking
right click on the tracking node, select connect to rig and choose the camera rig. You can double click the connection to edit the value mapping:
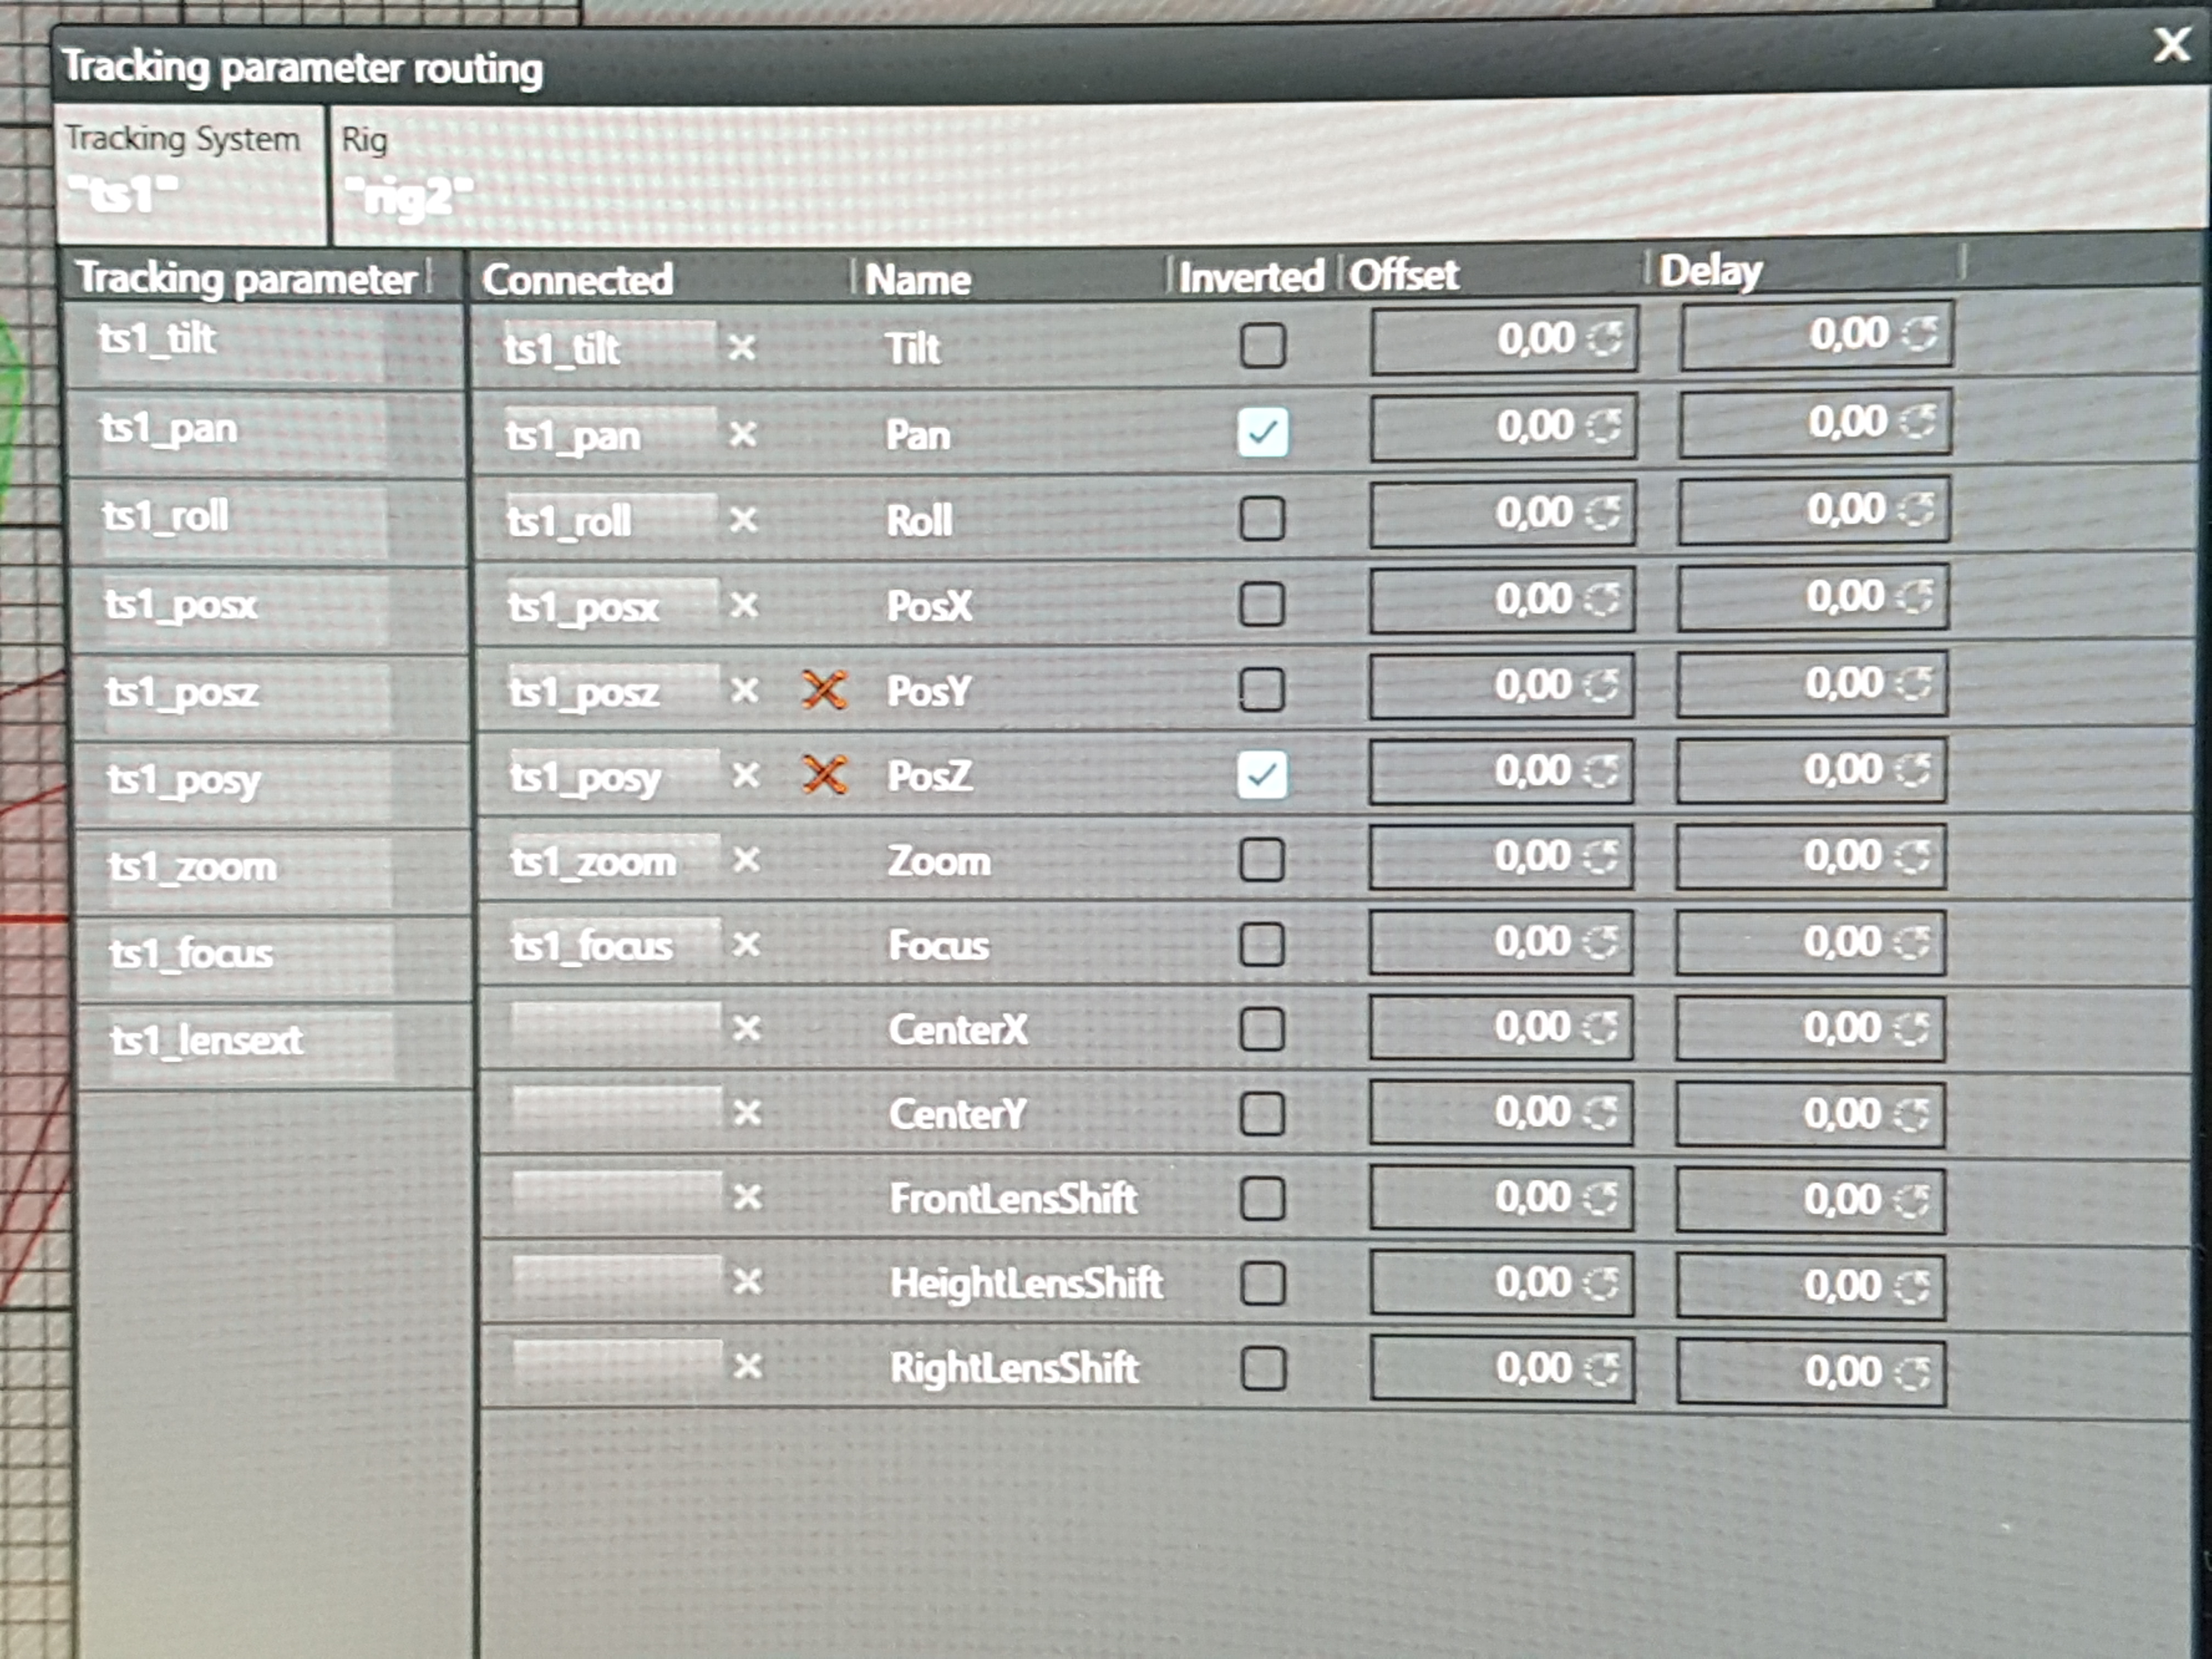
The encoder zoom and focus should be sent to the camera rig. The lens rig does not need to be connected to the tracking, it inherits the encoder values from the camera rig.
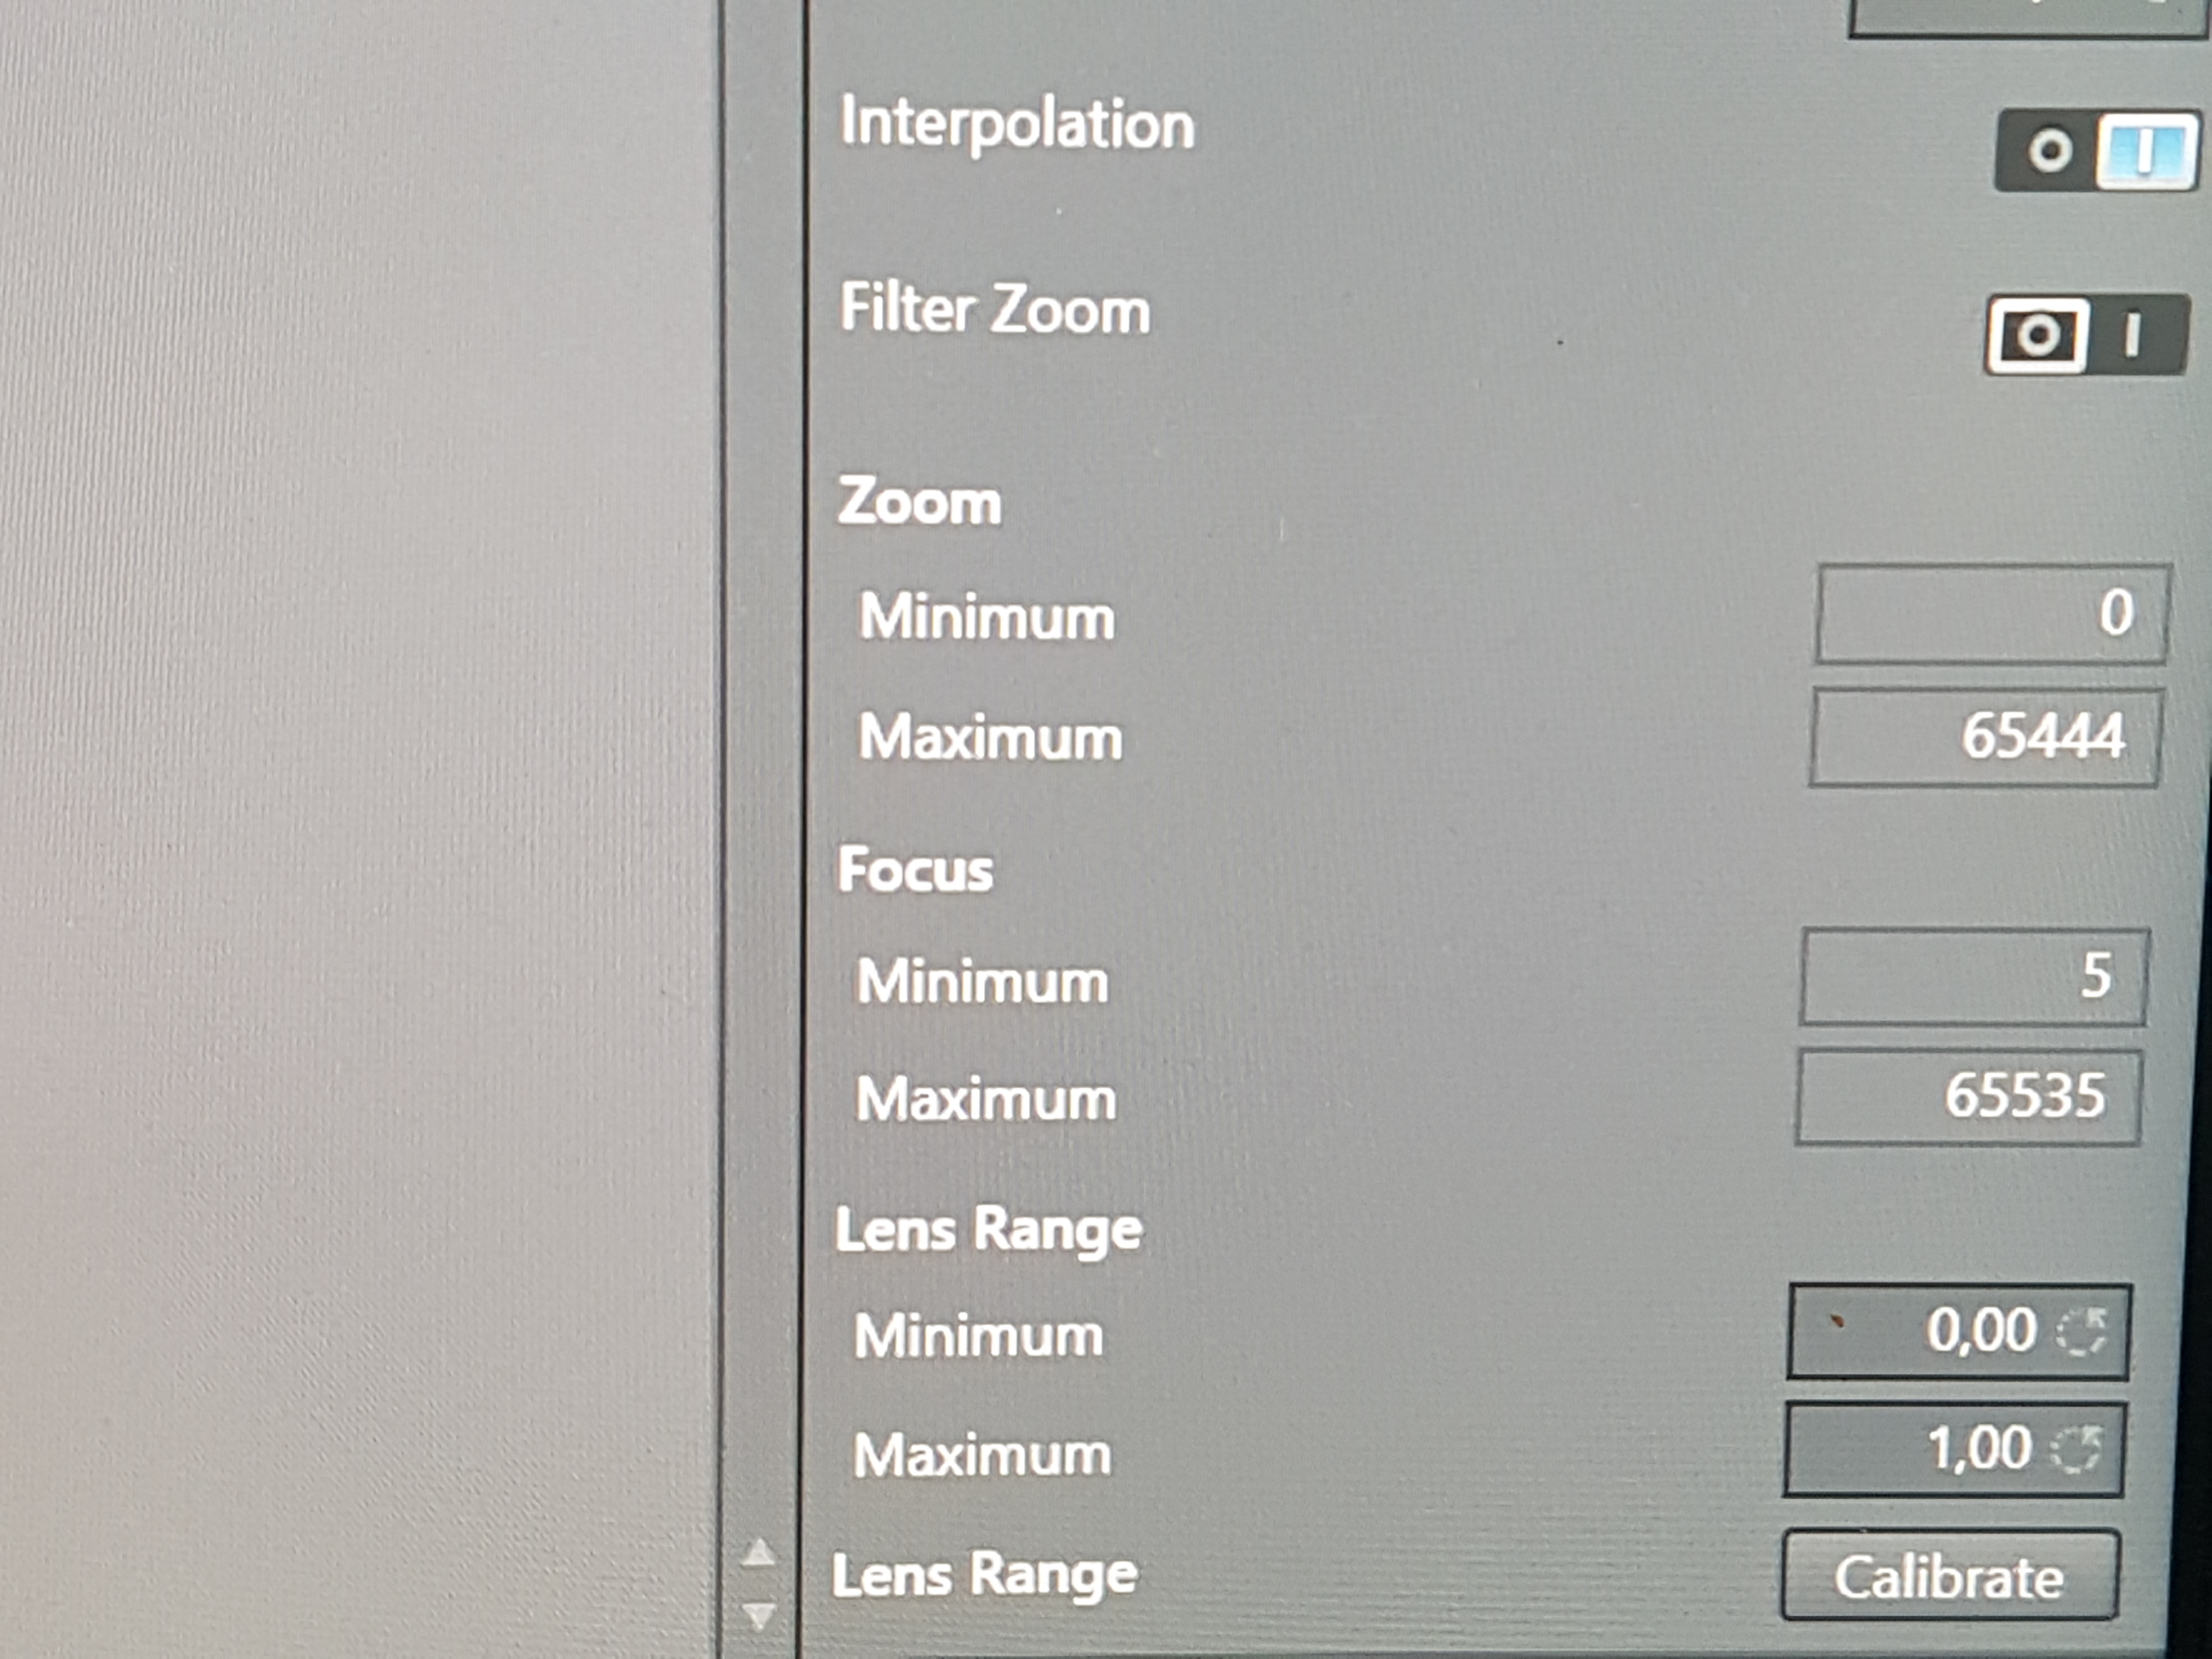
Calibrate the lens zoom and focus encoder range. Press the calibrate button, then move the lens between the minimum and maximum control stoppers.
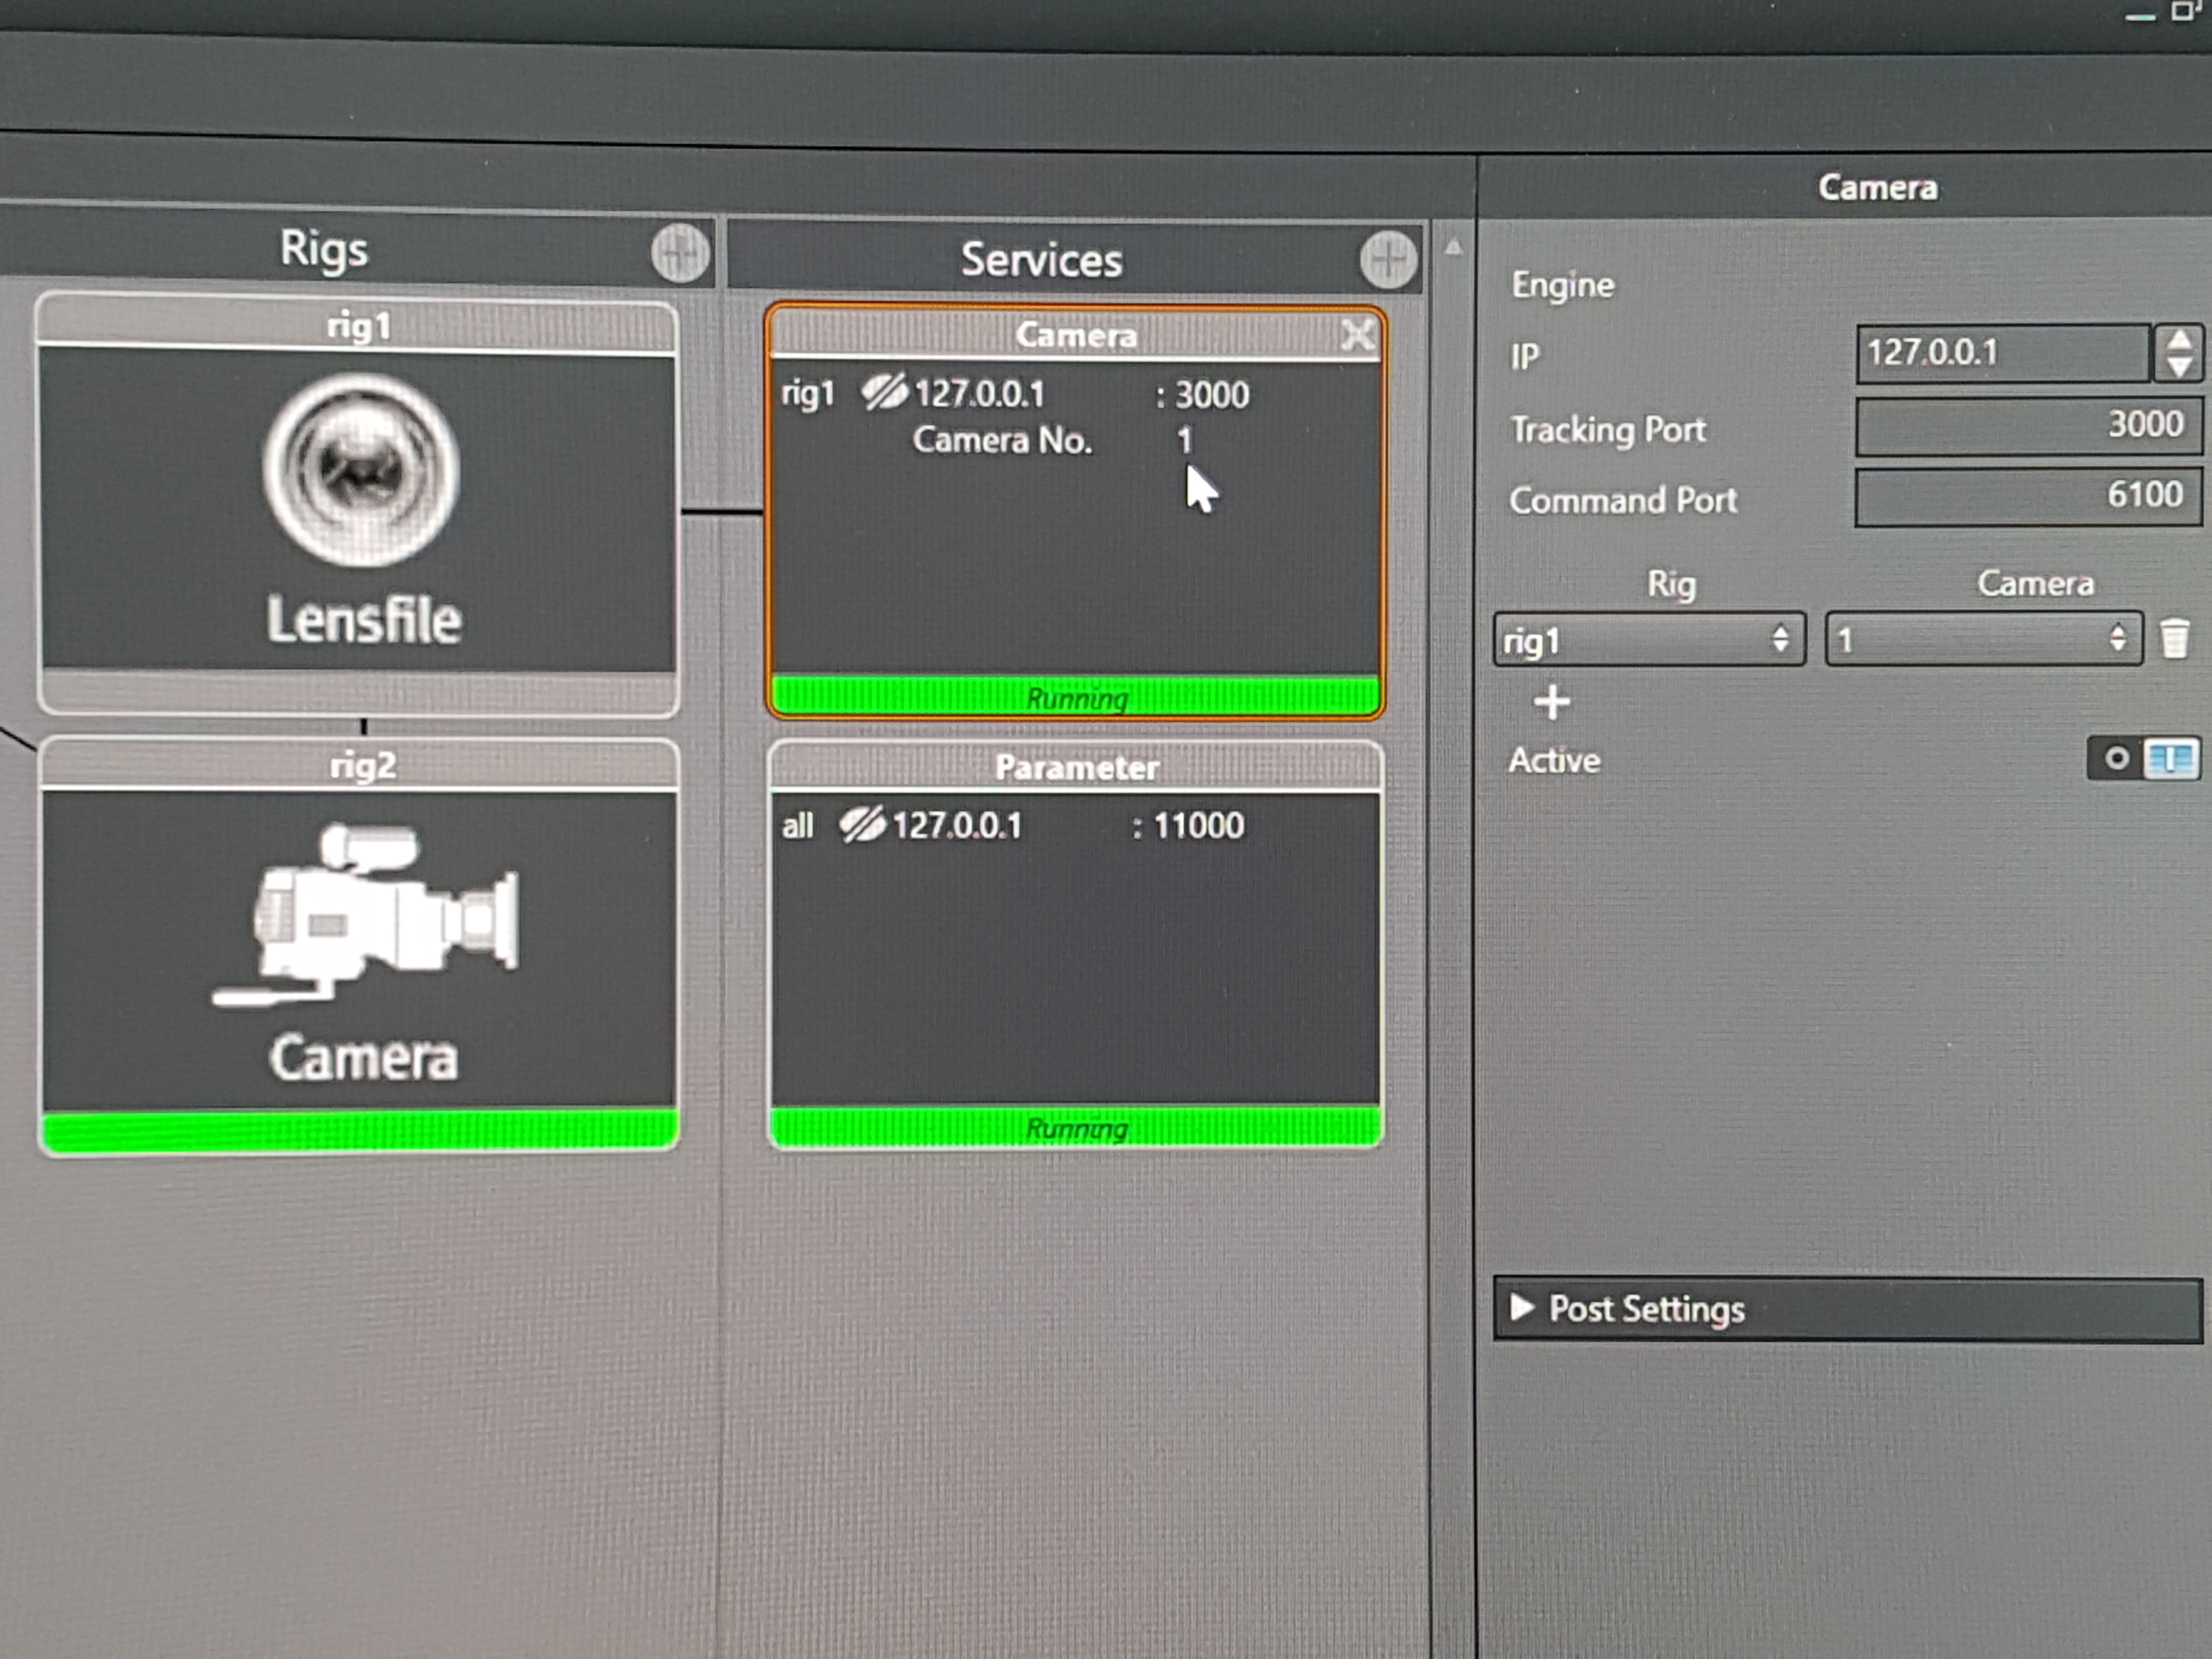
2.3. Send to Viz Artist
Create a Camera Service and in its control panel on the right, click on the plus sign under Rig to select the Lensfile rig and connect it to the camera that will be using it in Viz Artist:
3. Configure Viz Artist
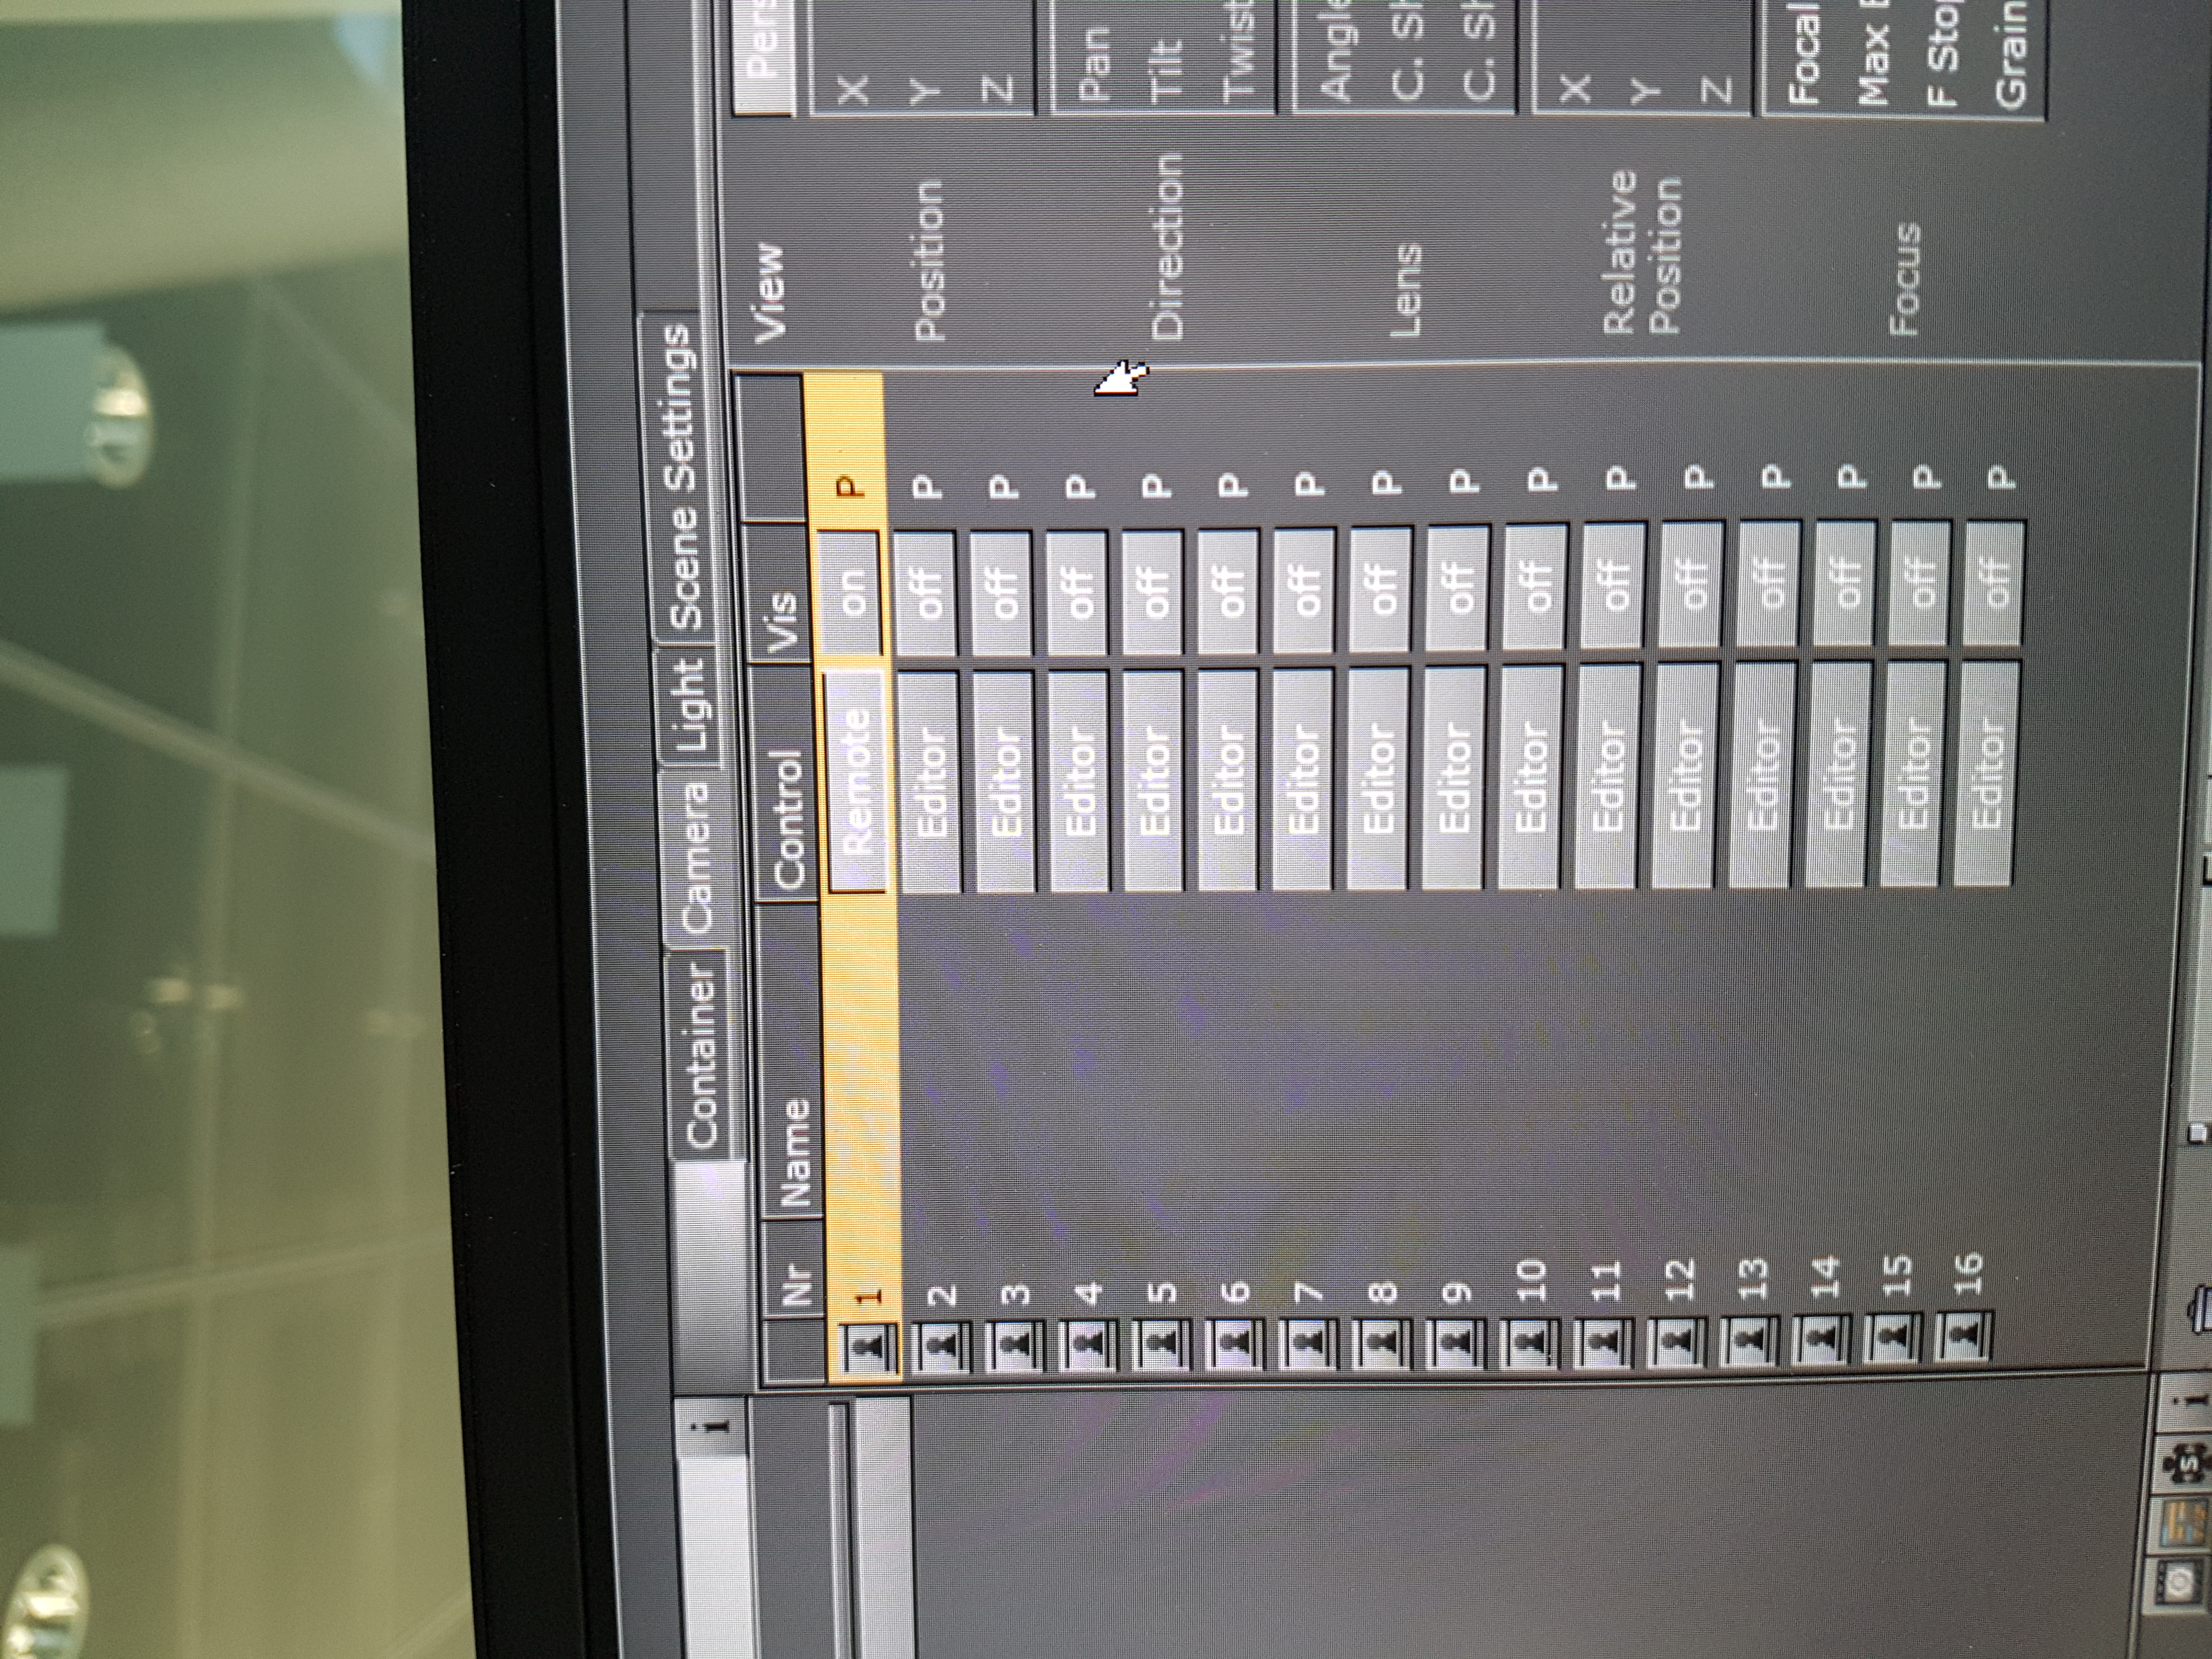
3.1. Get camera tracking
In Viz Artist, go to the Camera tab, select the same camera number as in Viz Tracking Hub, and set the control to Remote
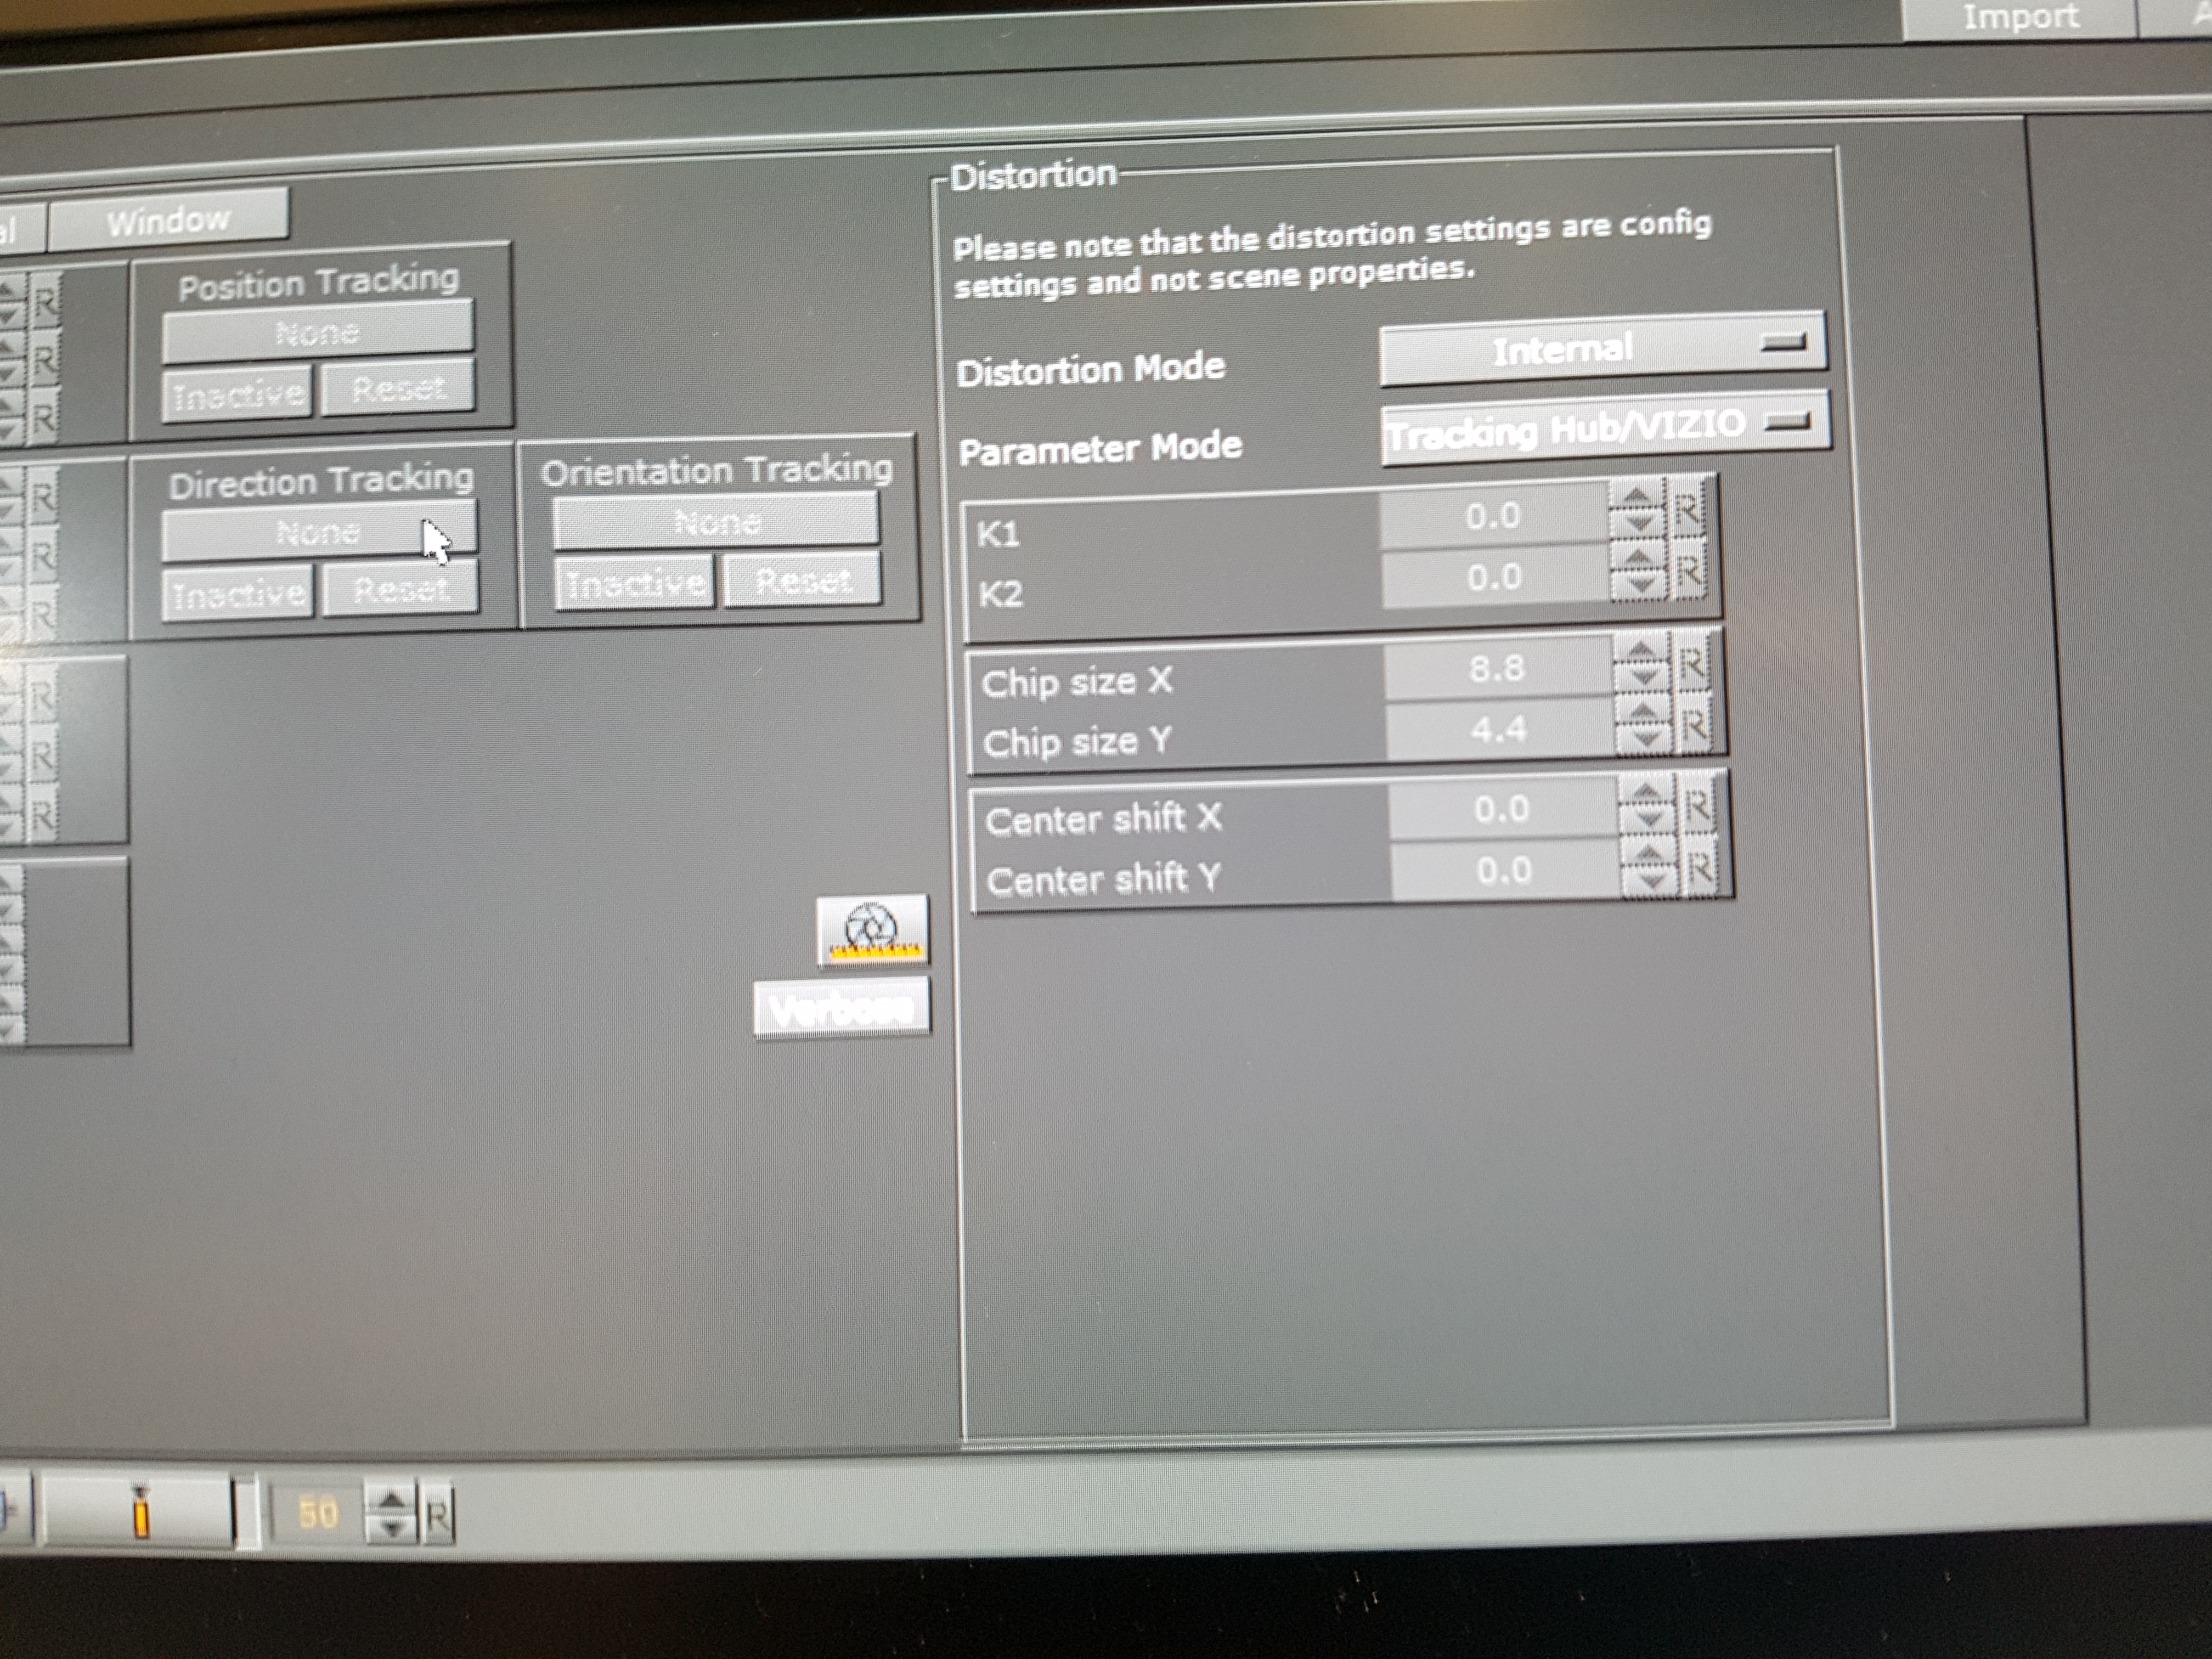
3.2. Take the distortion for tracking
Set the distortion mode to "Internal" and the Parameter mode to "Tracking Hub":
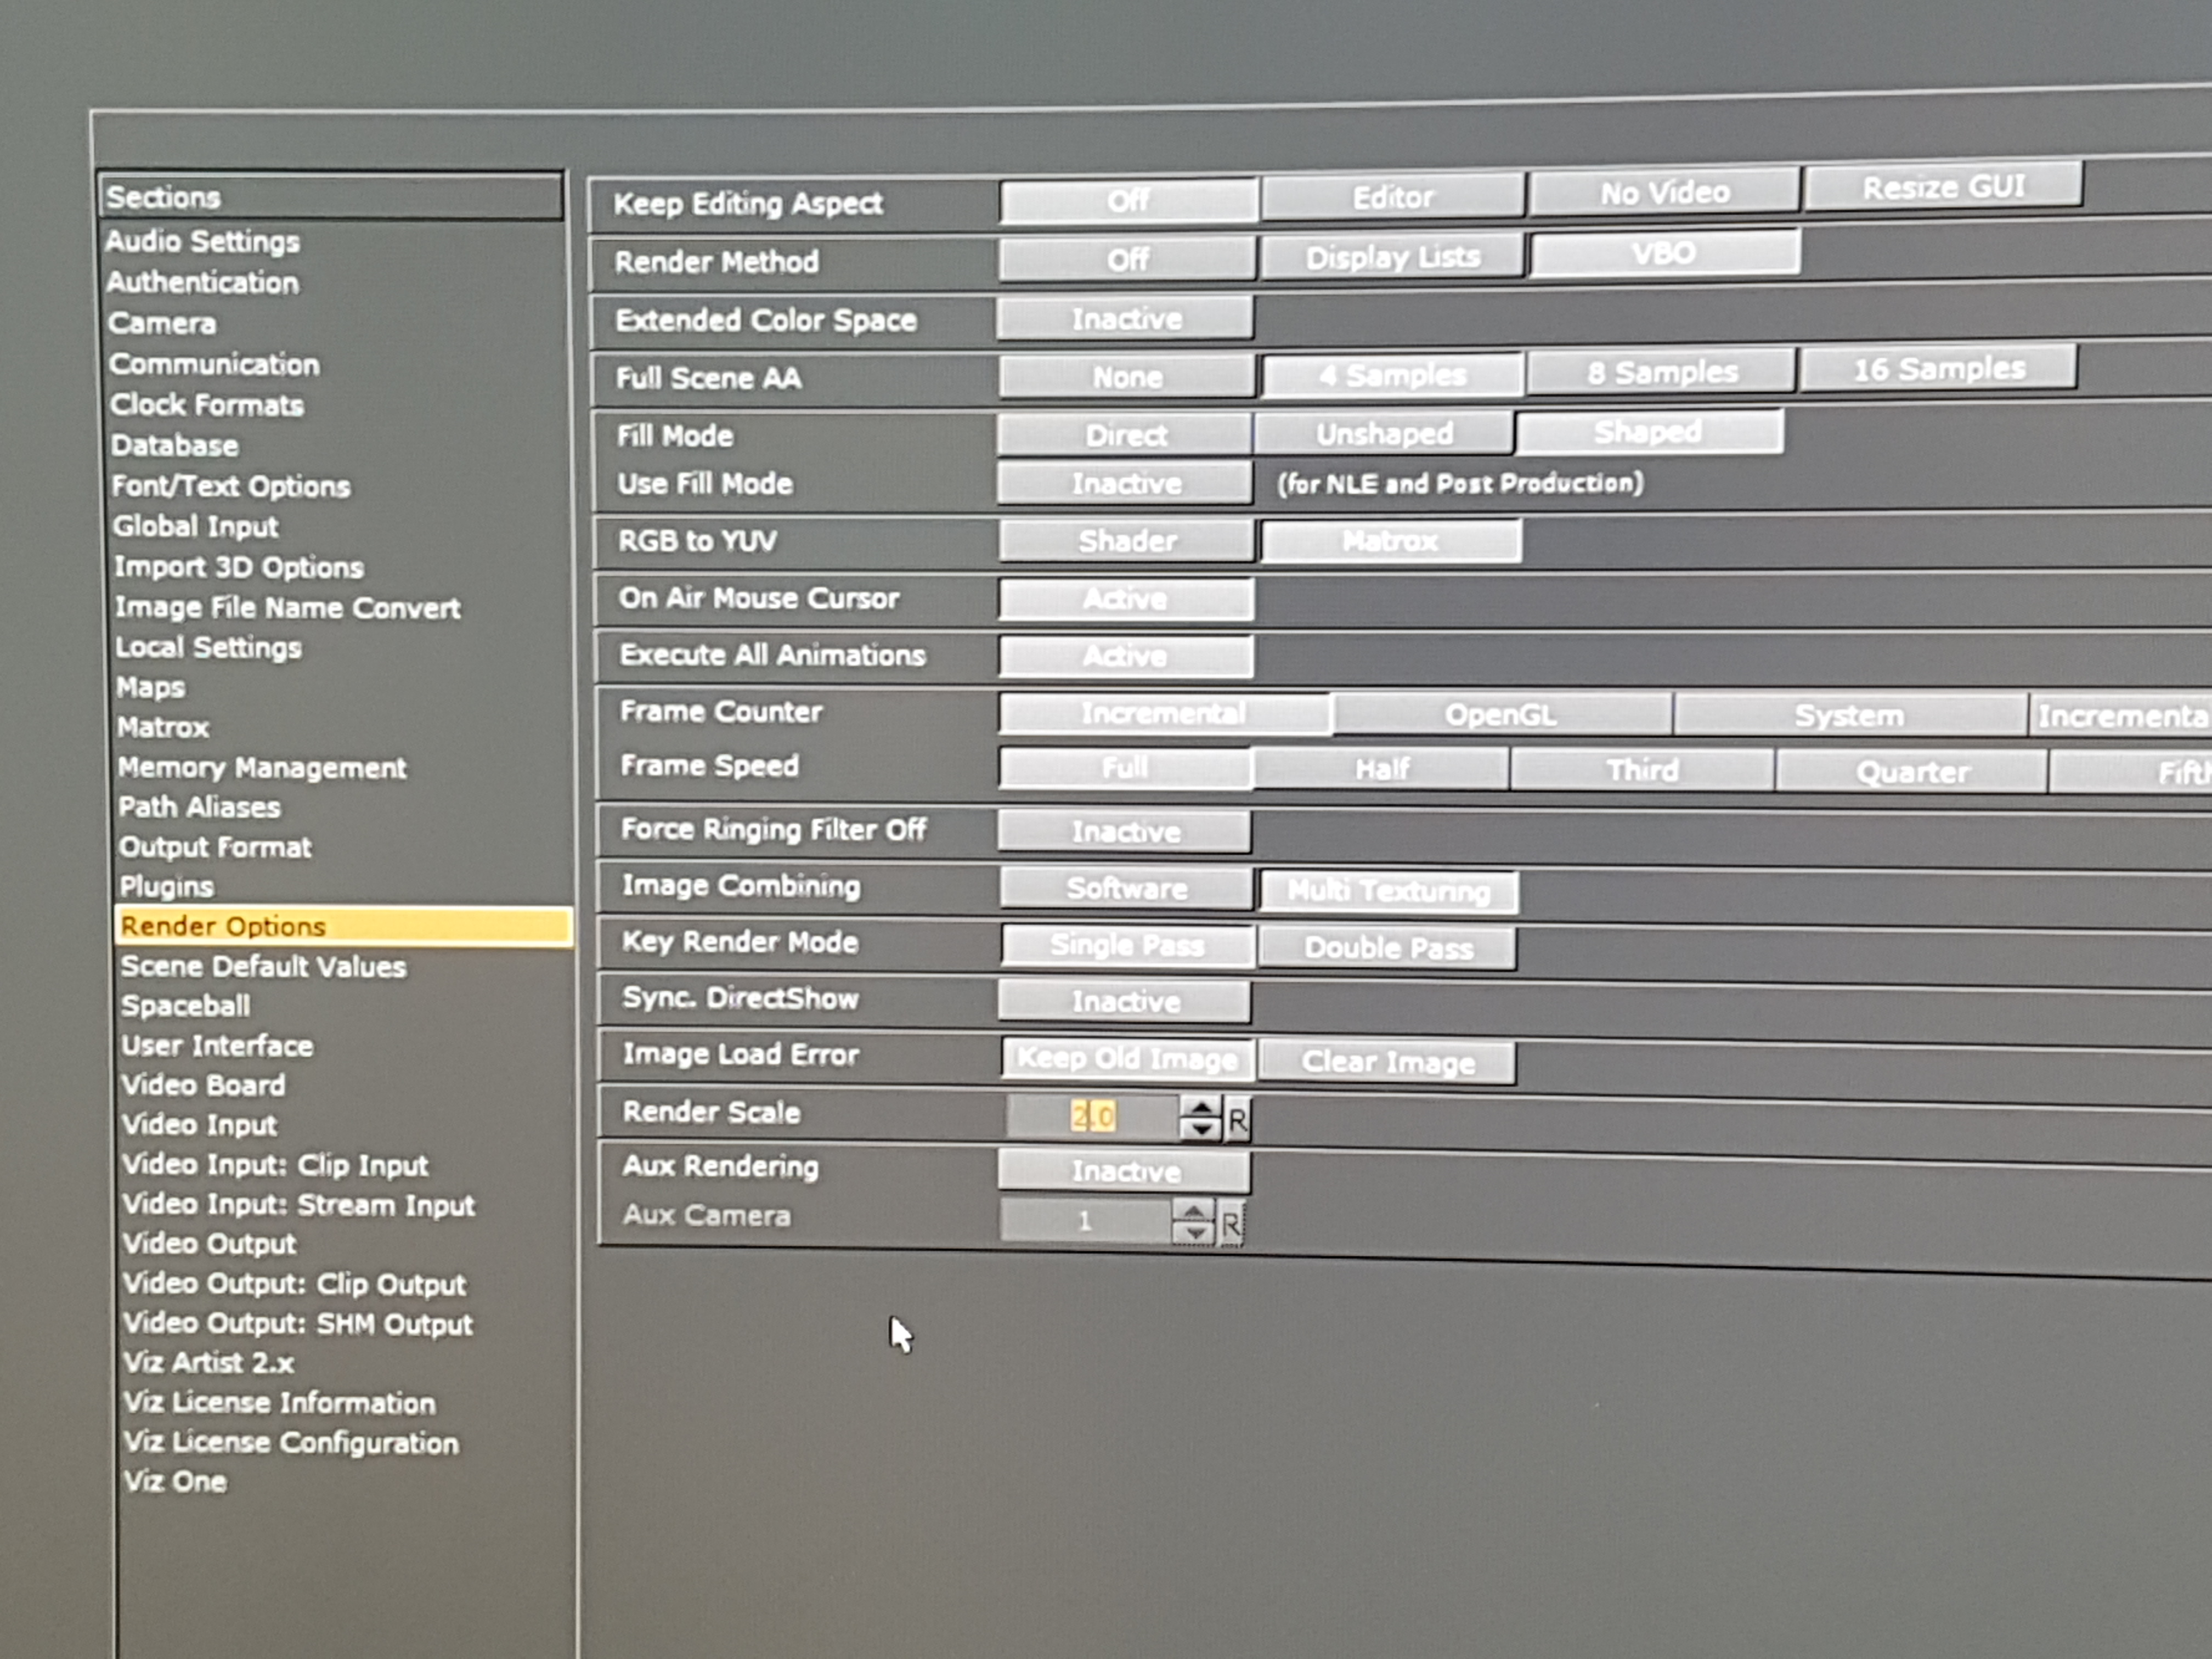
3.3. Add overscan
If the distortion is applied correctly, you will see holes on the side of the picture. To fix this, go to the render settings and increase the render scale until the holes disappear.