Export
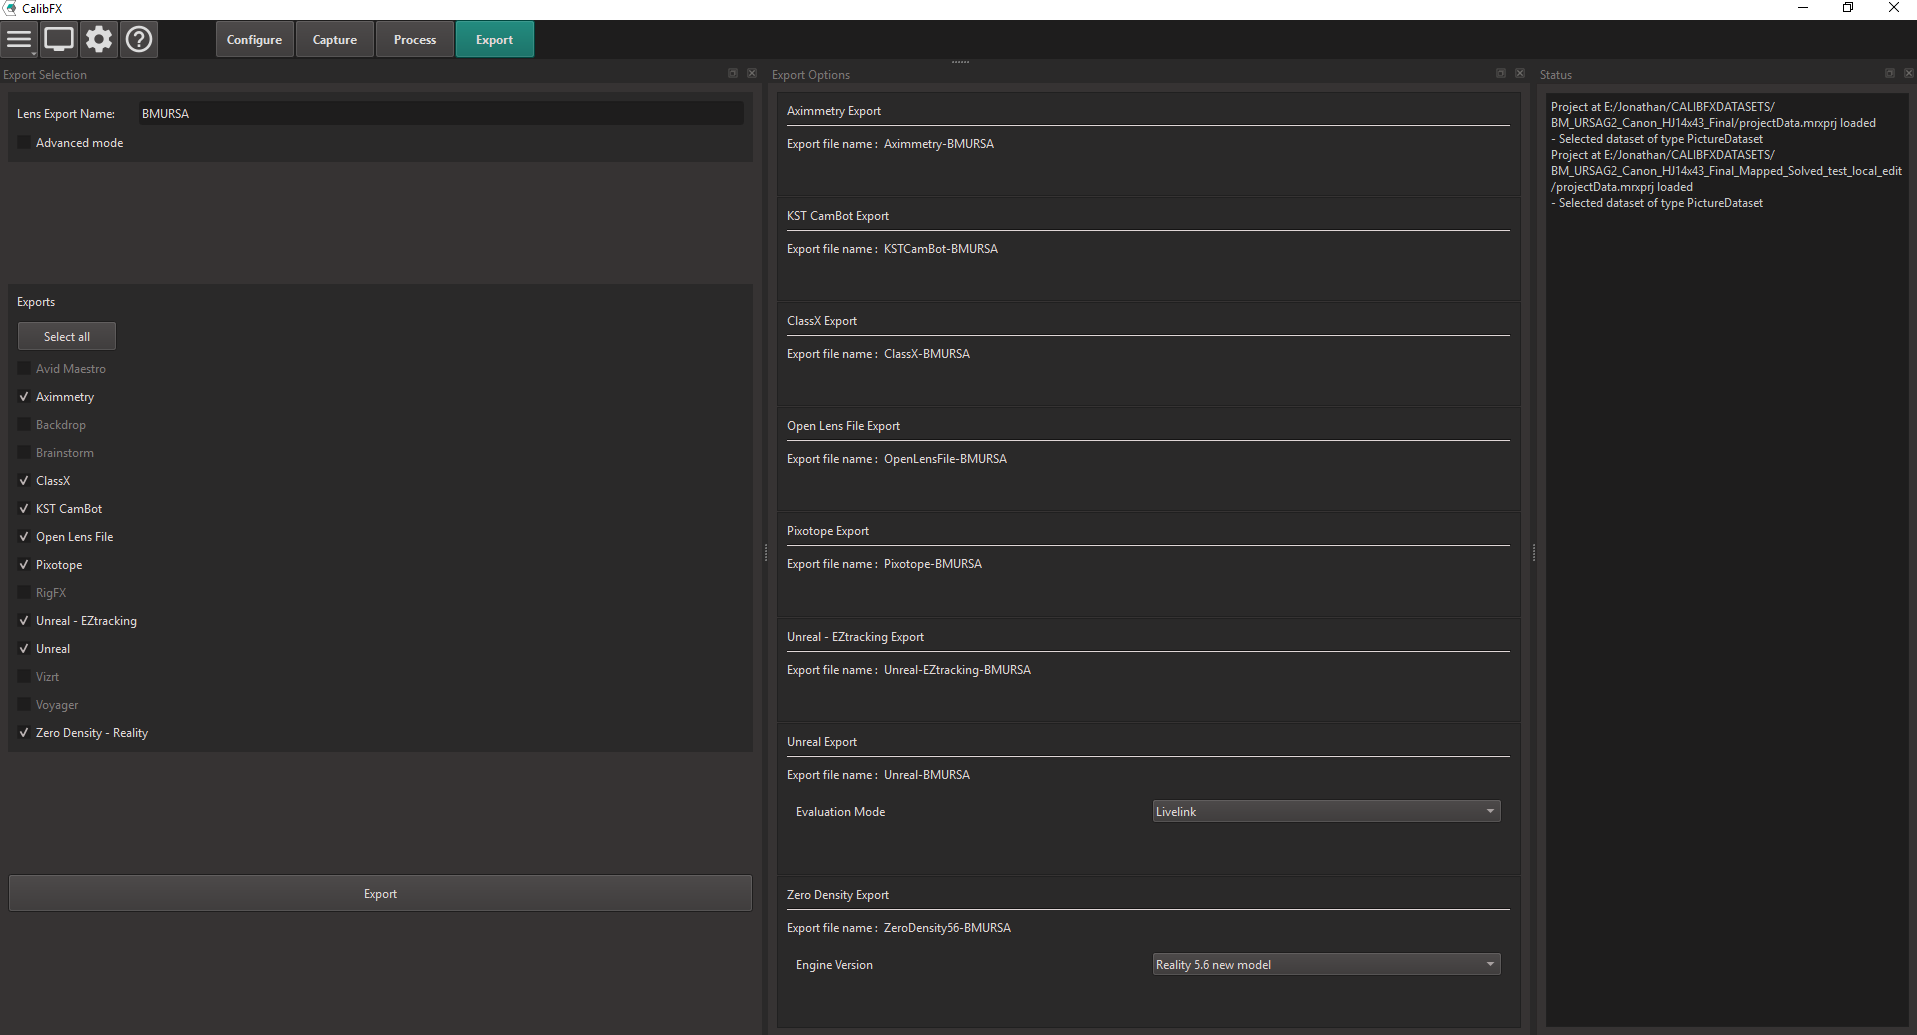
1. Export
The export is fairly straightforward. Name your lens file, select which targets you want, and press "Export".
Wait a bit while the program writes the files.
2. Use your lens file
Aximmetry
Copy the xml file generated to
%APPDATA%\Aximmetry DE\options_Aximmetry_DE_...\__DeviceSetups\CameraTracking\Cameras\
Aximmetry will detect the new lens profile at its next startup.
ClassX
In the LiveBoard software, go to Preferences and then Tracking Manager.
Find the line of your camera and select the Lens Profile cell. In the File chooser that opened, select your csxlens file and press open.
Open Lens File
The Open Lens File format is used for CalibFX Lineup. In CalibFX Lineup, just select the .json lens file and it will be loaded in the software
Pixotope
Open the Setup view in Pixotope Director. Go to Camera tracking > Lens tracking and open the Advanced section. Click on Enable lens file and then on Open file location.
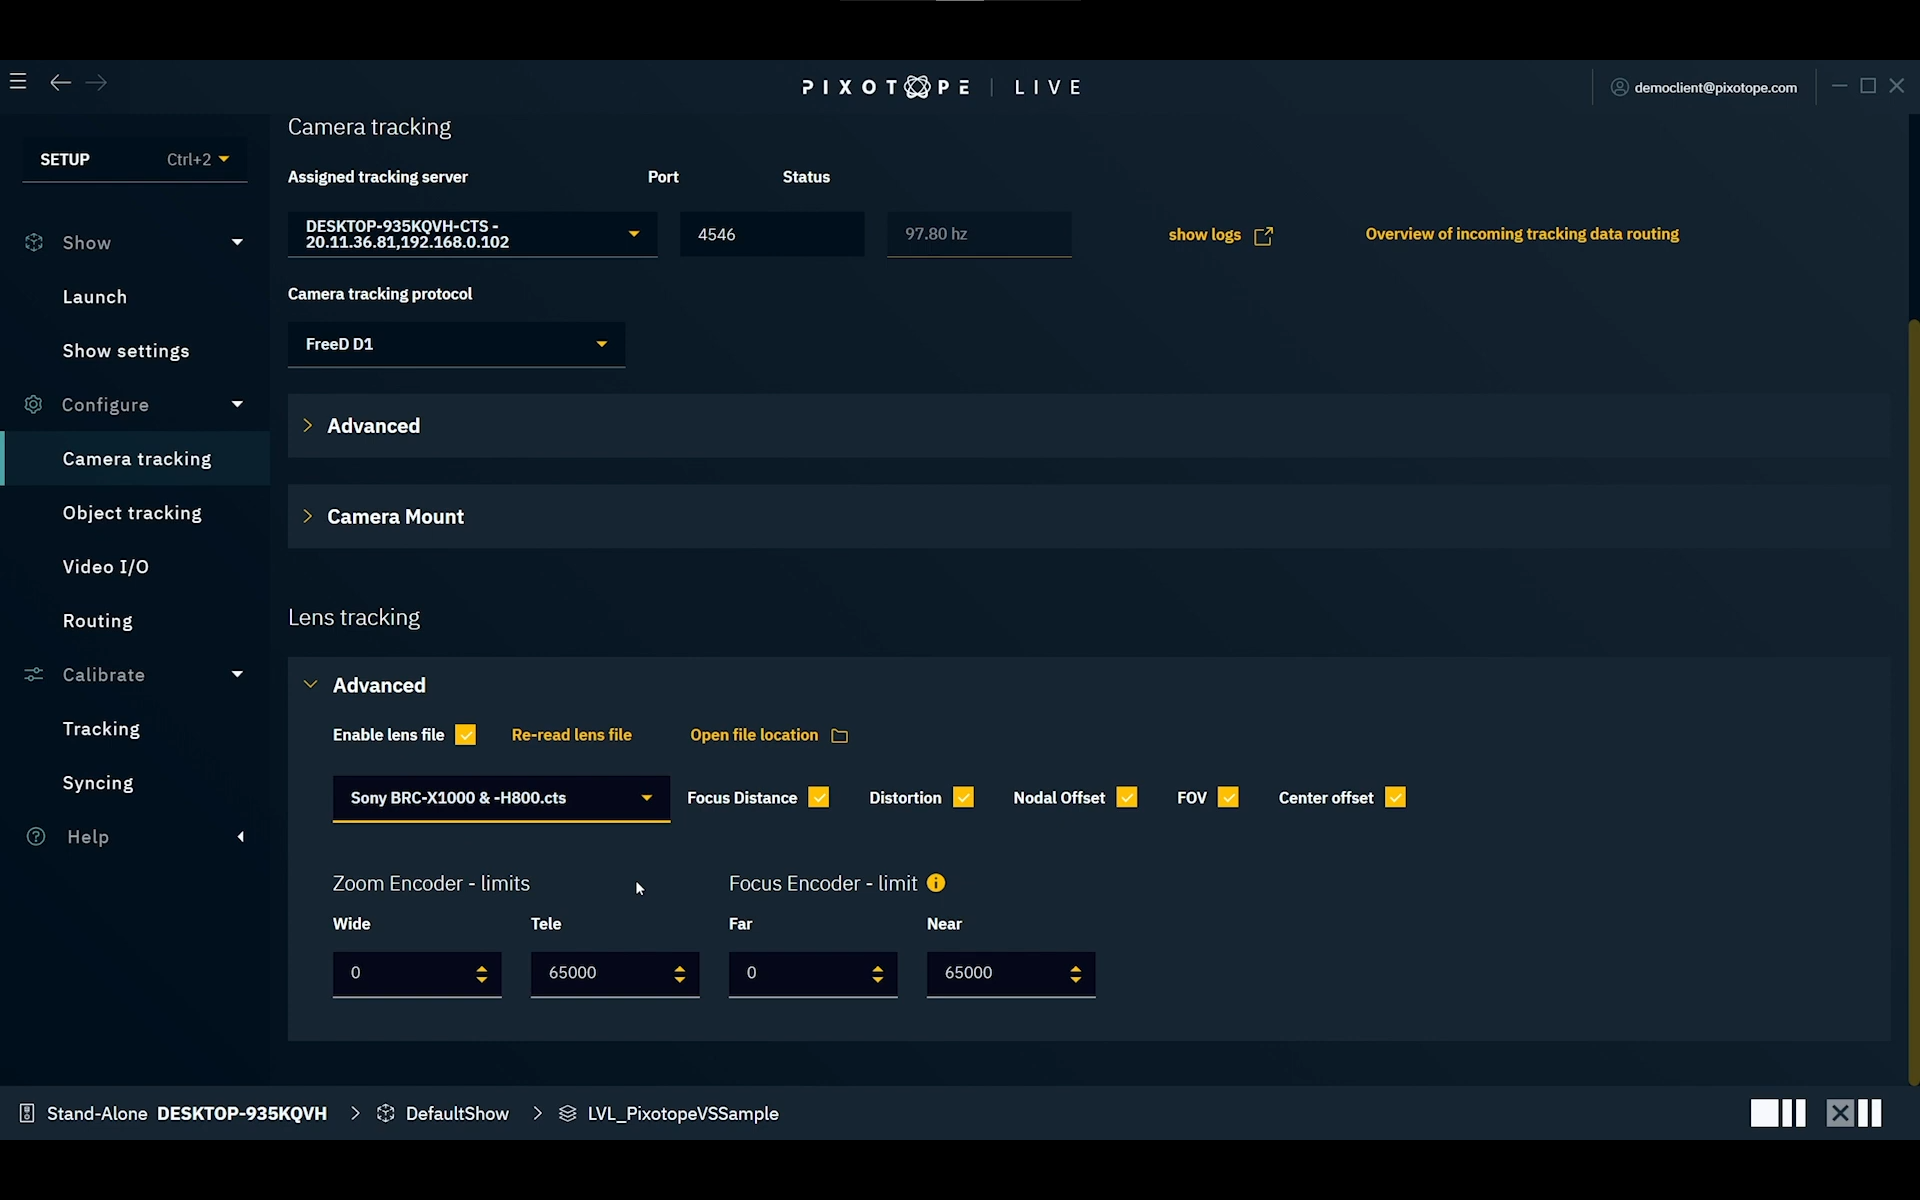
Paste the generated .cts file inside the open explorer.
Click in the Setup view on Re-read lens file, the generated lens profile will be available in the dropdown list.
Unreal Engine - EZtracking (Up to Unreal 5.6)
Install the EZtracking plugin and activate it inside the project plugins.
Drag and drop the .ezulens file in the content browser.

Add a Livelink Tracking Controller component to the Cine Camera Actor:
![]()
Set the tracking subject to the EZtracking source in Livelink:
![]()
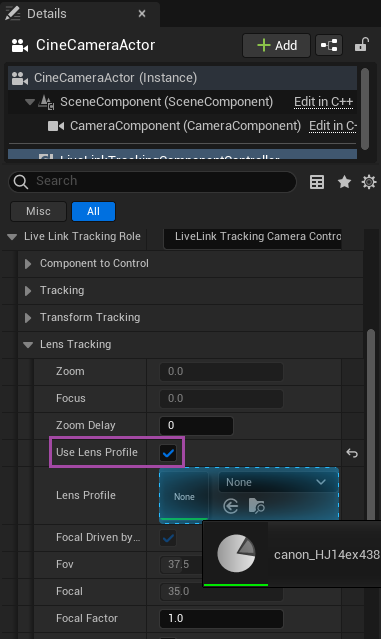
Check the "Use Lens Profile" box and drag-and-drop the EZtracking Lens asset from the content browser to the socket just under:
Unreal Engine 5.6 and below
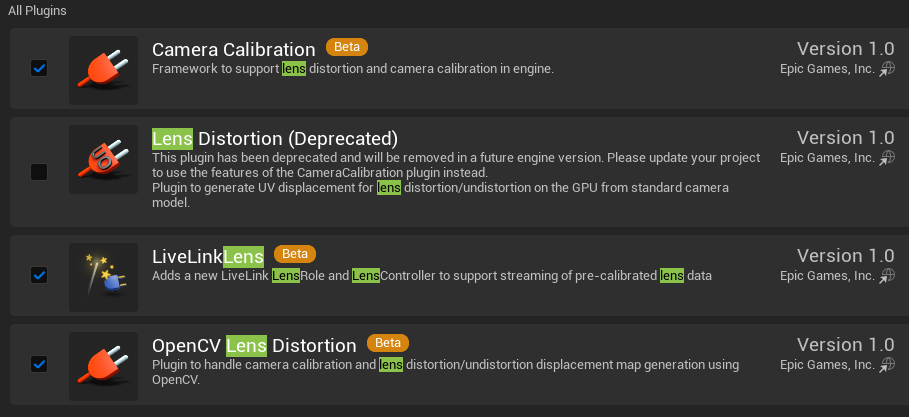
In unreal, make sure you have the following plugins enabled:
- Camera Calibration
- LiveLinkLens
- OpenCV Lens Distortion
Drag and drop the .ulens file in the content browser.

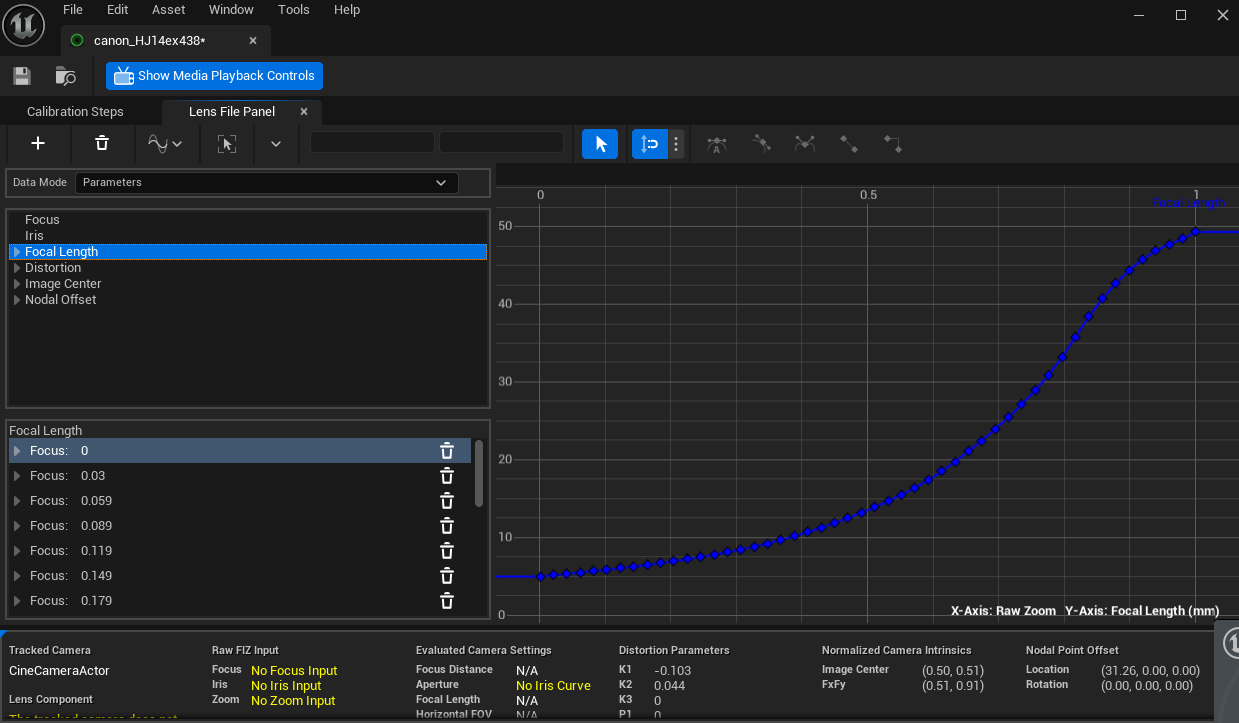
If you double-click on the lens uasset, this window will appear with all the curves already filled in:
Warning
The camera must receive the lens tracking through a Livelink component, like when using the Livelink FreeD plugin.
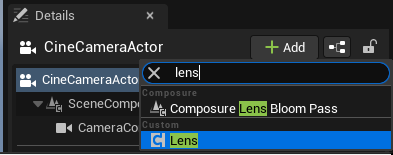
Add a "Lens" component in the Cine Camera Actor:
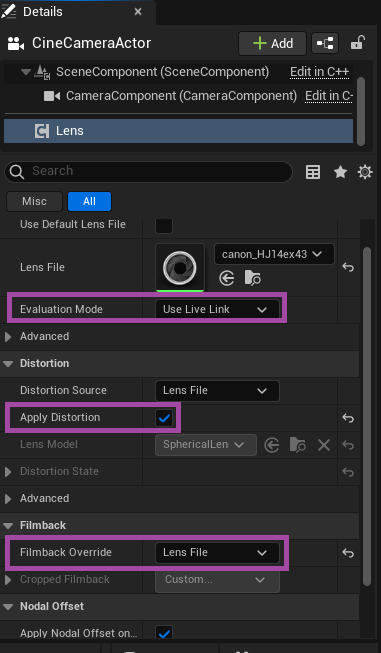
You can now drag and drop the lens asset in the "Lens File" slot. In addition to this, you need to activate "Apply Distortion" and override the filmback with that of the lens file, as shown below:
Unreal Engine 5.7
In unreal, make sure you have the following plugins enabled:
- Composure
- LiveLinkFreeD
- LiveLinkCamera
- Camera Calibration
- Timed Data Monitor
Drag and drop the .ulens file in the content browser.
Add a CineCameraActor to your scene. Make sure its transforms are all zeros.
In the Live link Panel add a new LiveLinkFreeD Source and setup it to the port on which you receive your FreeD data.
Select the FreeD line of your new Subject and go under Source -> Focus Distance Encoder Data. Make sure the min and max match the min and max you set in CalibFX-Lens.
Do the same for the Focal Length Encoder Data.
In the Project Settings, search "livelink" and select the subject you created for the Default Live Link Preset setting.
Add a "LivelinkComponentController" in the Cine Camera Actor. Select your subject in the Subject Representation setting.
Go under Camera Role -> Camera Calibration -> Lens File Picker. You can now drag and drop the lens asset in the "Lens File" slot.
Add a "Lens" component in the Cine Camera Actor:
Drag and drop the lens asset in the "Lens File" slot
In the Filmback section, select "Lens File" in Filmback Override. In addition to this, you need to activate "Apply Distortion" and override the filmback with that of the lens file, as shown below:
Zero Density - Reality
-
Open TraxisHub
-
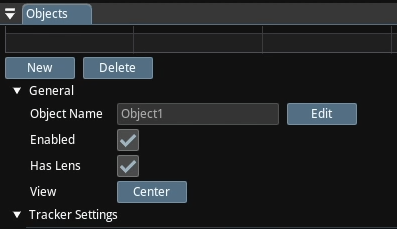
In the Objects panel, click on the "New" button
-
Unfold the "General" settings and check "Has Lens"
-
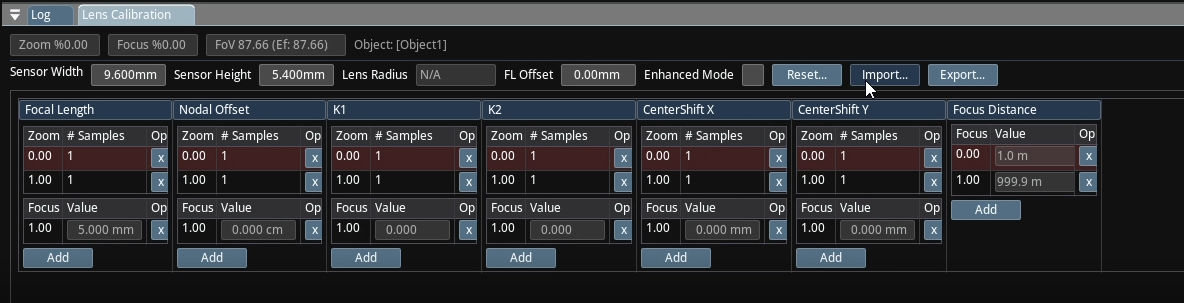
In the top left corner, select Window -> Lens Calibration Editor
-
In the "Lens Calibration" panel that just opened, click on "Import..." and select your lens file
-
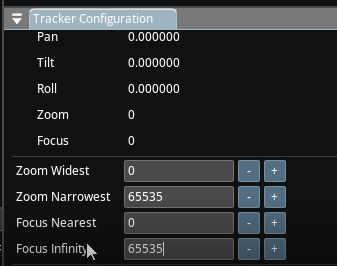
In the "Tracker Configuration" panel, add a new FreeD-UDP tracker
-
In the "Zoom Narrowest" and "Focus Infinity" settings, set the maximum encoders values that you had in CalibFX-Lens.