1. Introduction
There is a limit to how refined and realistic real-time graphics can look. Affording sometime after a shooting to improve it with an offline render and post-production can take a scene from looking like a video game to a believable result, as well as more flexibility to tweak the animation, environment and match lighting.
Usually, a lot of work in post-production is dedicated to reverse-engineering data, especially to match lens distortion. However, during a virtual production shoot, a lot of this data is generated and validated on set. If the lens calibration used in real-time is propagated to post-production, the artists only must apply it to the recorded footage to straighten it as reference, and then distort the CG renders to match the distortion of the plate.
2. ST-Maps
While real-time engines work faster using shaders and coefficients, mostly based on the Brown-Conrady model, the normalizations are not unified. The easiest way to handle distortion in post-production software is using ST-Maps.
An ST-Map is a mapping of pixel position in colour channels. For example, red could be the X position and green the Y position:

figure 1: ST-Map example
This encodes the displacement of pixels between the distorted and undistorted image spaces.
3. Undistorting the Plate
In a separate conversion project, open the “Compositing” workspace. Toggle “Use Nodes” and get rid of the “Render Layers” node:
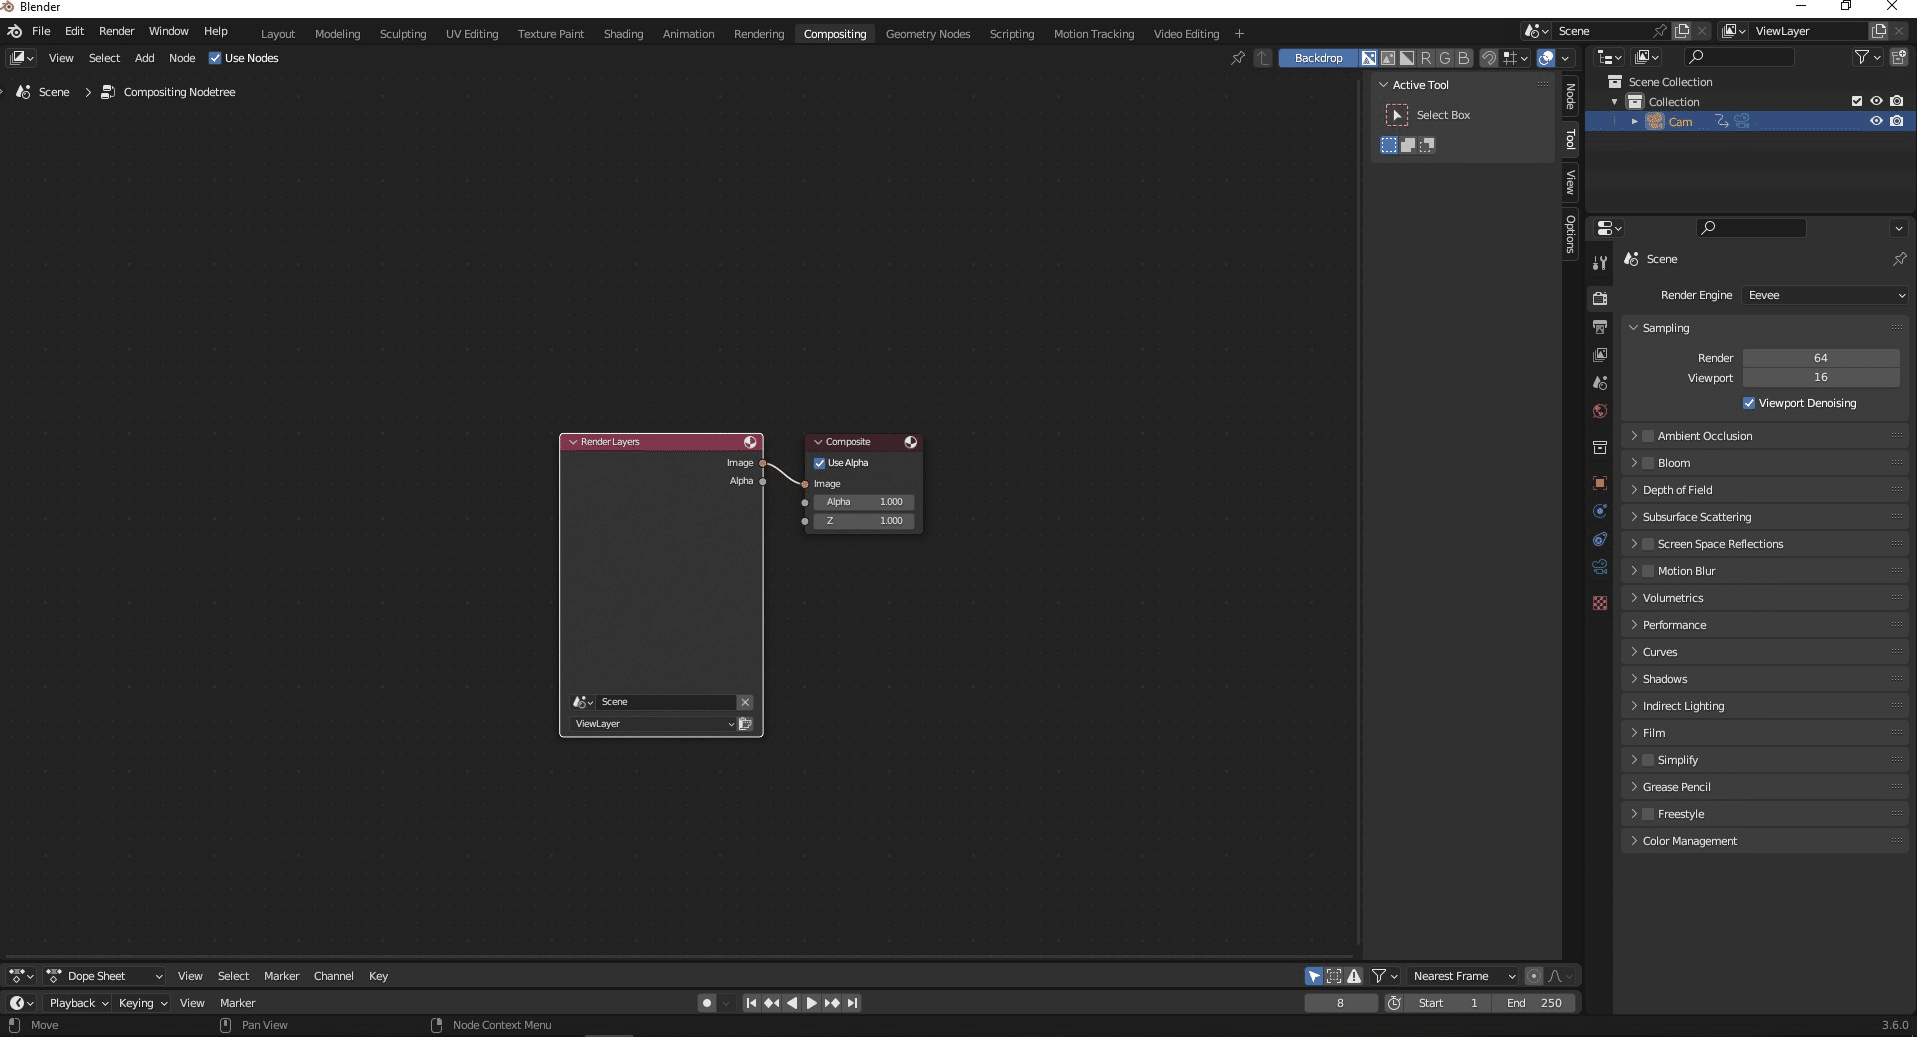
figure 2: default compositing nodegraph
Add a “Movie Clip” node and browse to the raw video plate. Here we also added a reroute node and a viewer node for clarity:
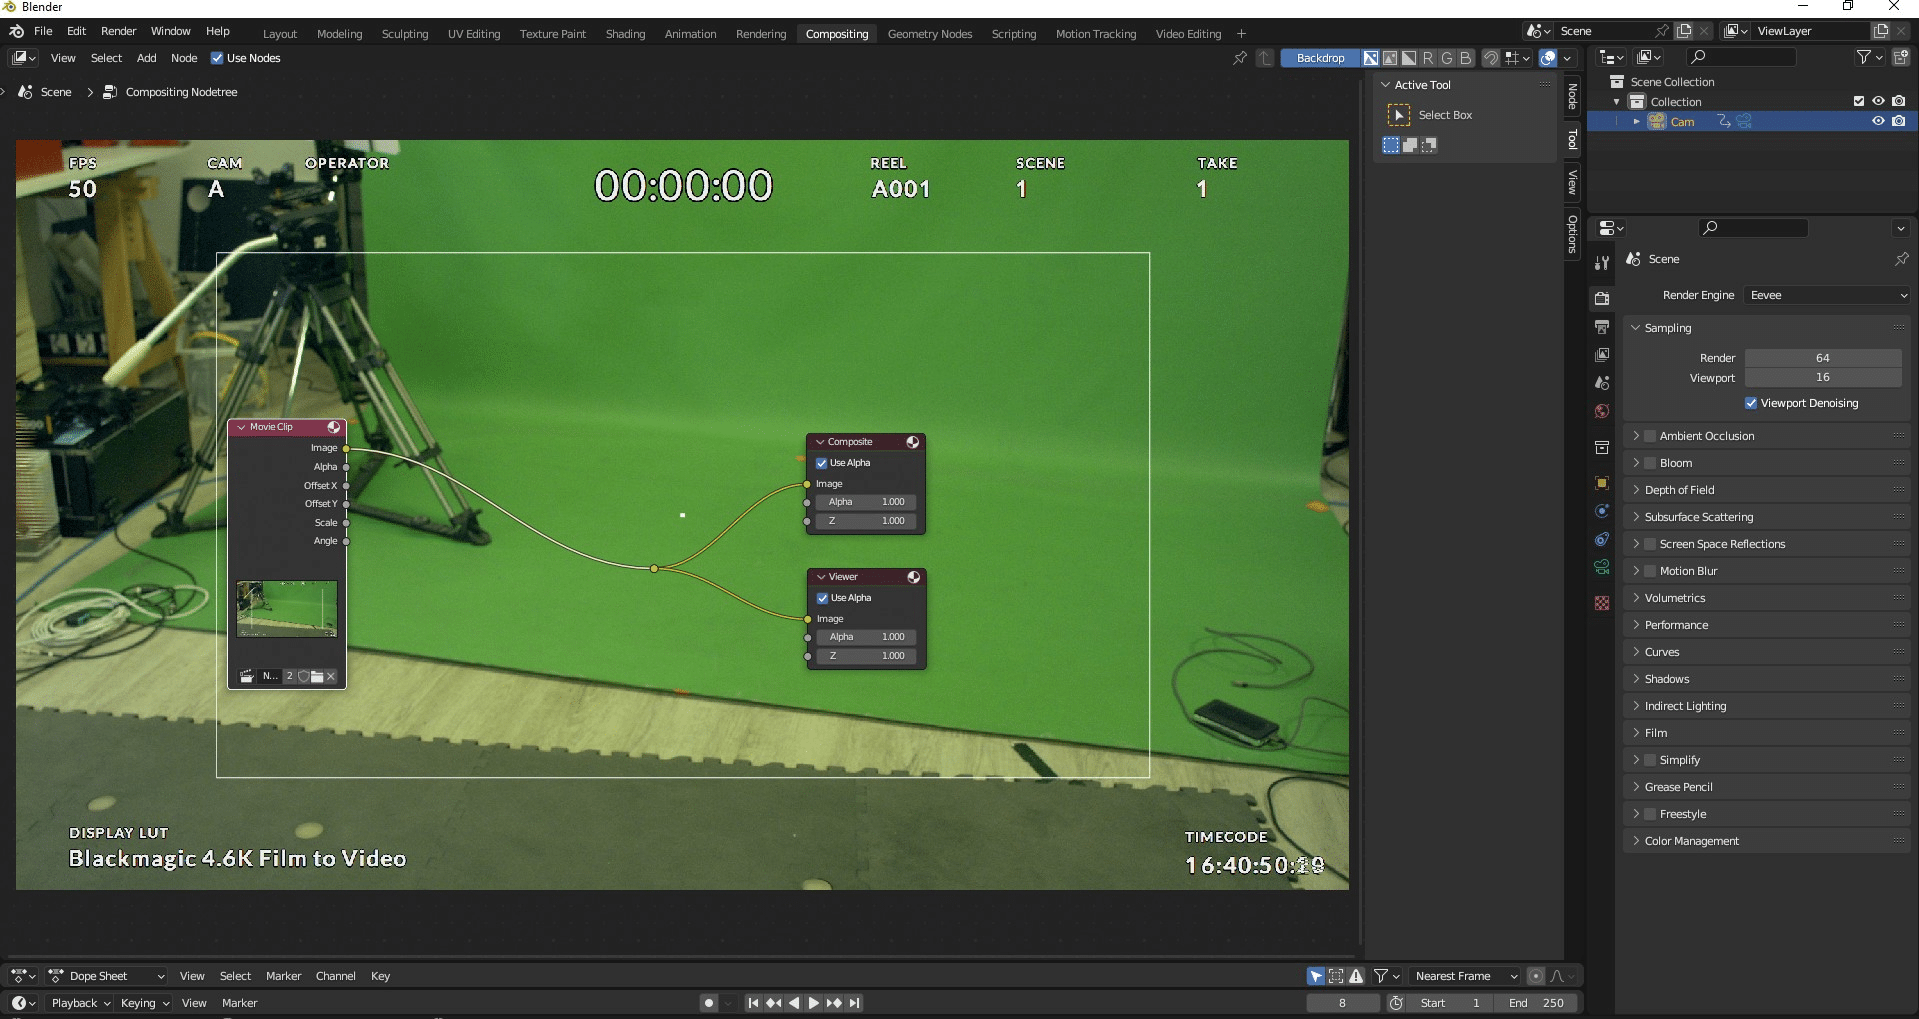
figure 3: video plate loaded and displayed
You can press the “V” key until the preview is the right size, and alt+middle click to move it around.
Add an “Image” node and a “Map UV” node. In the image node browse the ST-map corresponding to the lens used:

figure 4: select the undistortion ST-Map
Now, if you were to just plug everything together, the image becomes empty. This is because contrary to most other software, blender interprets the Z=0 in the ST-map as a mapping to zero alpha. We therefore must compensate for it by manually setting Z to 1 with a “Separate XYZ” and a “Combine XYZ” node:
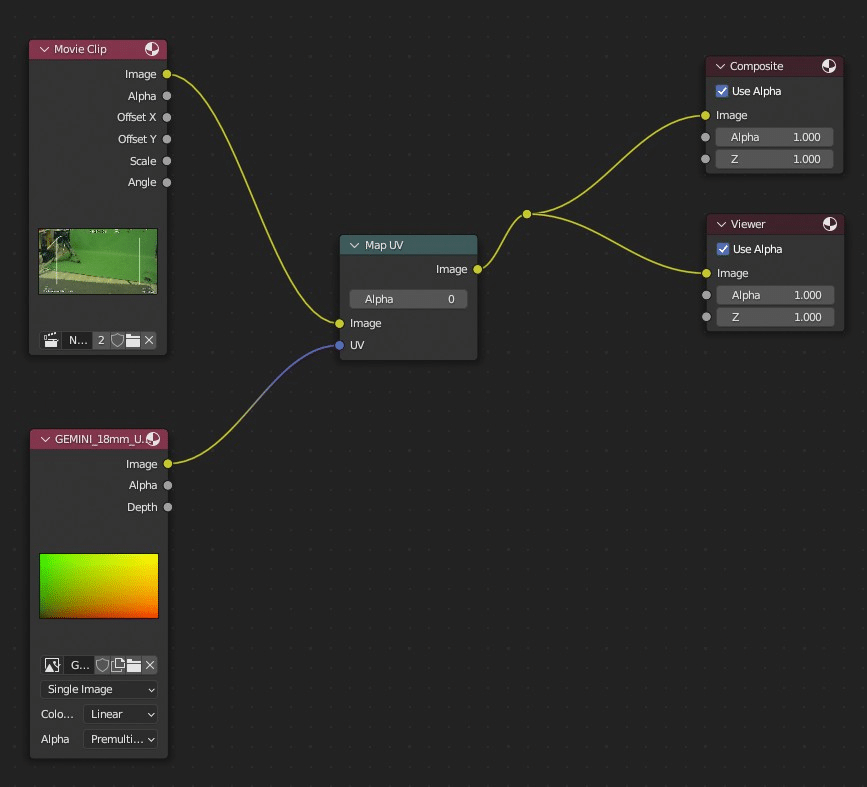
figure 5: intuitive nodegraph that does not work
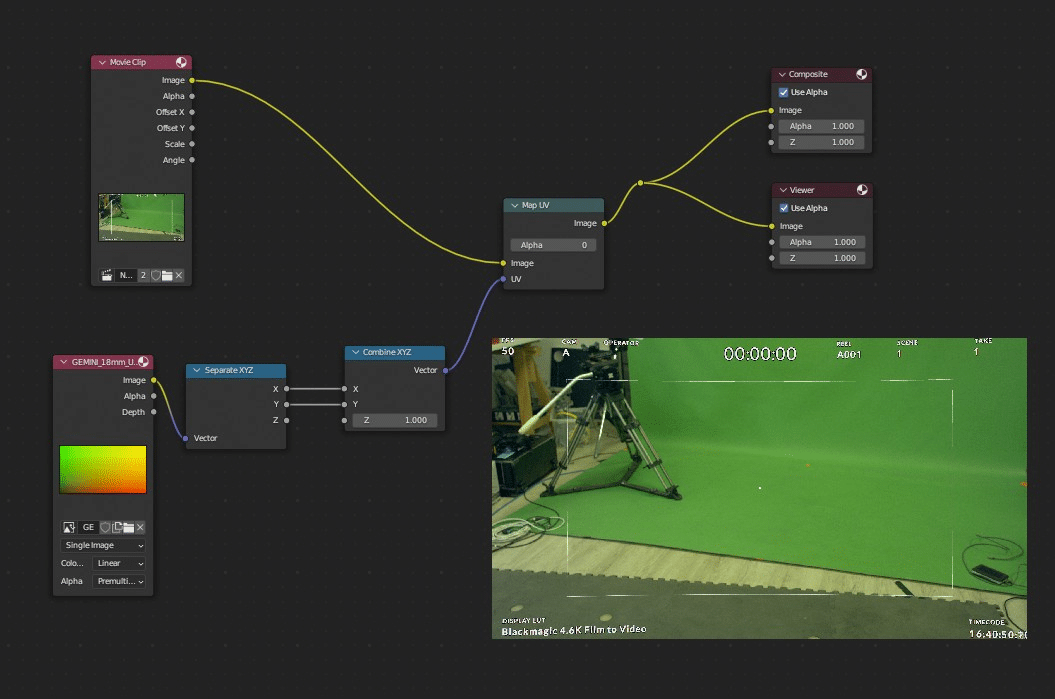
figure 6: after setting Z=1 on the ST-Map
Now just render the whole thing out and you have an undistorted plate to use as reference for the placement of the CG:
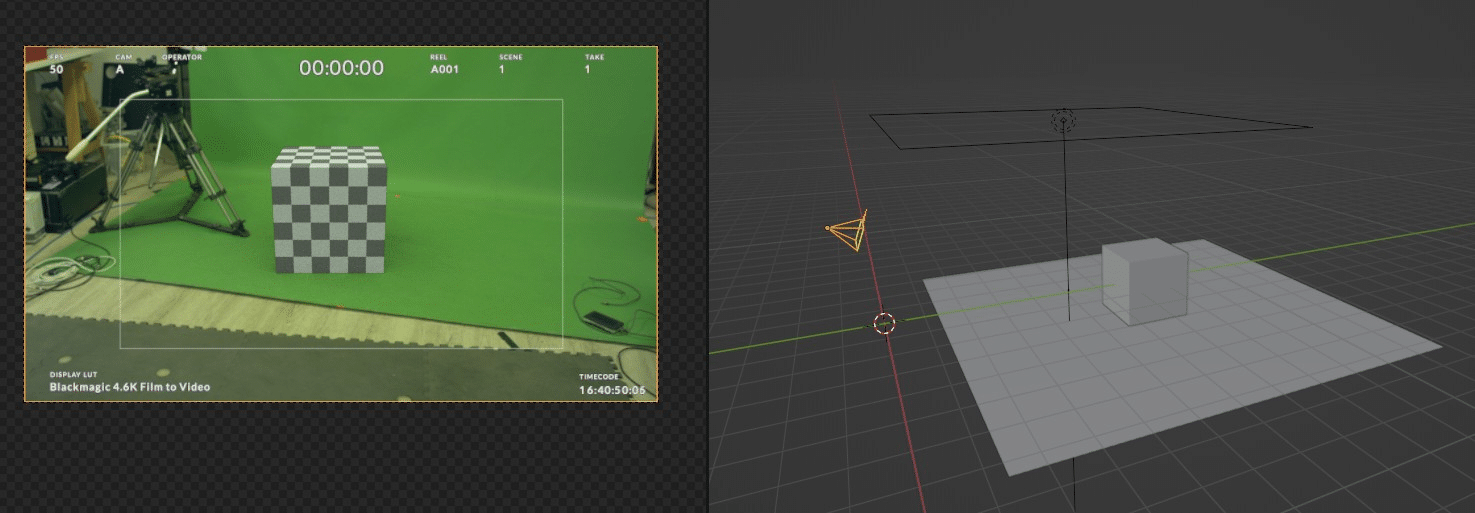
figure 7: using the undistorted plate as camera background for reference
4. Distorting the CG
The principle is the same as for undistortion except you use the rendered passes instead of the raw plate and the distortion map instead of the undistortion map. Here for the example we are distorting just after the rendering using the “Rendered Layers” node, but it is safer and faster to render all the passes first (as .EXR image sequence) without a compositing pass and then distort them in another project externally.
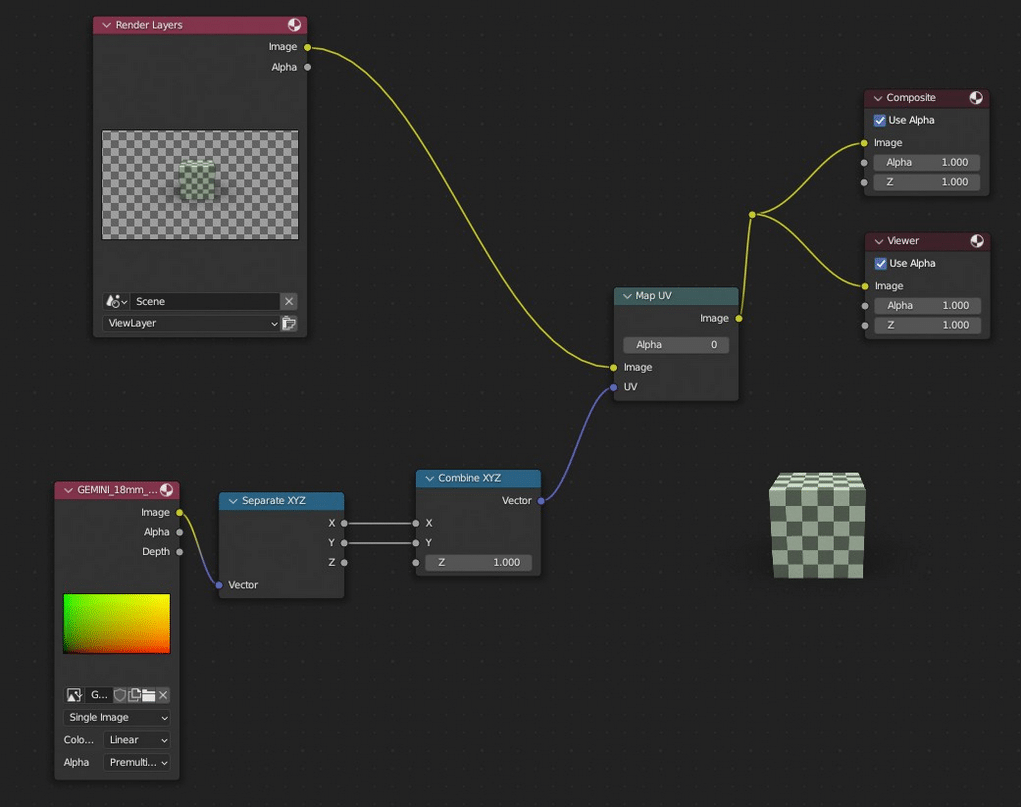
figure 8: distorted CG image
And to composite the distorted CG with the original plate, note that we need to distort the alpha channel as well. This applies to every render pass, they all have to match the distortion:
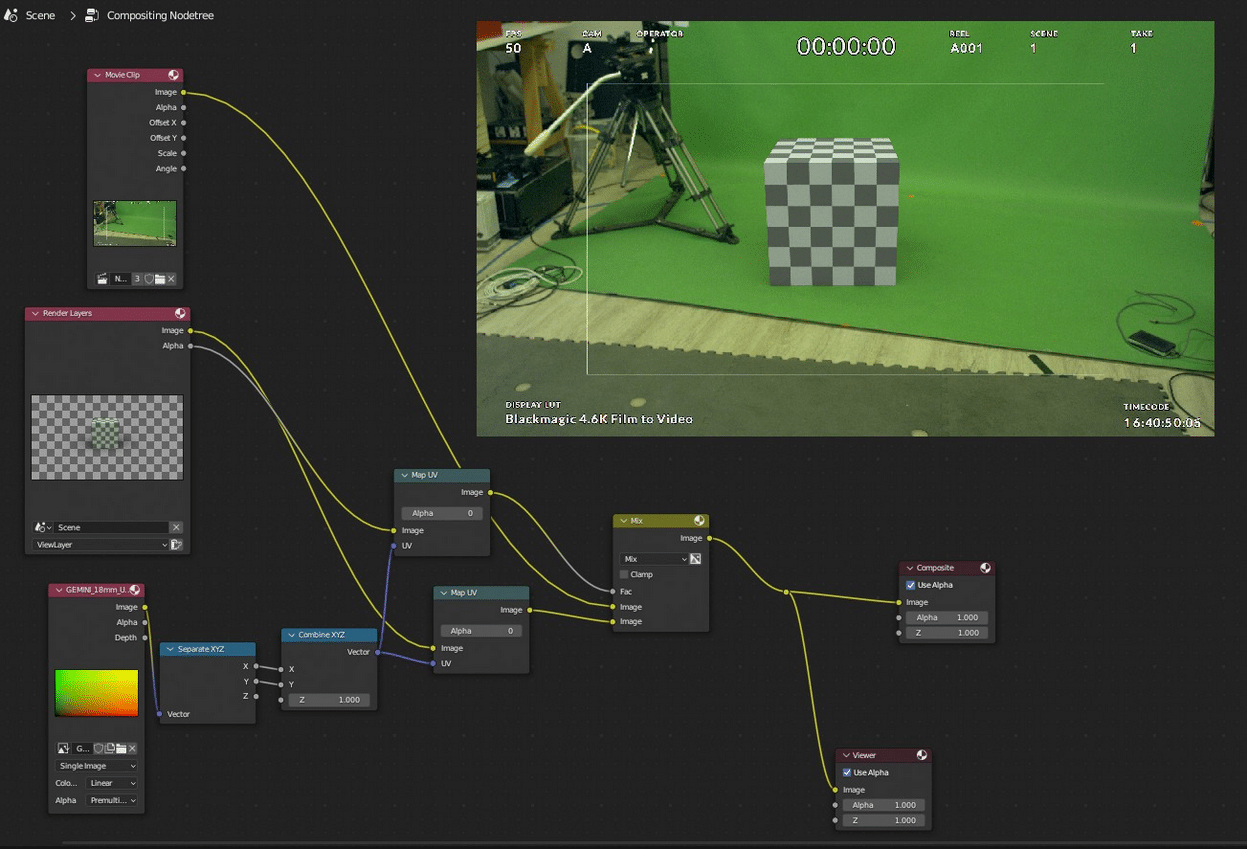
figure 9: final composite
5. Generating the ST-Maps
A general way to create an ST-Map from a rendering engine like Unreal Engine if you already have a lens file in it is to feed as input a straight image mapping from 0 to 1 and letting the real-time shader distort it. Then render it as a 16- or 32-bit EXR image.
Another option is to use CalibFX® Lens: CalibFX® Lens, universal lens profiler for virtual studio – EZtrack®. Miraxyz develops this lens calibration software which can directly export ST-maps of a calibration, or a sequence of ST-maps for zoom lenses or primes that breathe significantly.
A similar workflow based on ST-Maps was implemented in collaboration with Cooke Optics for the movie Comandante, which was shot on anamorphic. Learn more: Lens metadata workflow for filmmakers & DOPs – EZtrack®.