Configuring Unreal for EZlineup
This guide presents how to implement the resulting EZlineup transforms in Unreal using LiveLinkFreeD.
As usual, doing things in bare Unreal requires a lot more tinkering around than using a dedicated render engine like Aximmetry.
1. Configure LiveLinkFreeD
Install the plugin if it is not already:

Create a LiveLink source:
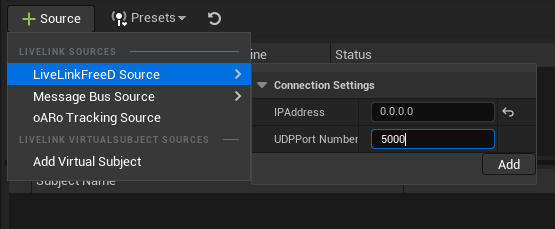
Usually without EZlineup, you may want to plug this directly into a CineCamera. However if the tracking system does not provide ways to offsets, like EZtrack, this means it is impossible to adjust the offset between the tracker and the sensor in Unreal.
2. Set up the Camera Tracking Hierarchy
2.1. Create the hierarchy
Create a hierarchy like the following, with four Actors and then the CineCamera:

Make sure that all transforms are 0 after creating the hierarchy.
Tip
It is recommended to also put a cube of scale (0.5, 0.5, 0.5) at position (25, 25, 25) under the StudioOrigin to quickly check that the reprojection is equivalent to the result in EZlineup.
The first actor defines the studio origin. All CG objects that relate to real objects should go under here, to allow moving the vistual scene around the studio.
The second actor defines the referential offset. This is where the Referential Offset Transform from EZlineup will go.
The third actor is the tracker. This is where the LiveLink position and rotation data will go.
The fourth actor defines the tracker offset. This is where the Tracker Offset Transform from EZlineup will go.
The fifth, the CineCamera, is the sensor. This is where the lens data from LiveLink will be used. The only transform applied here should be the nodal offset from the lens file.
2.2. Add a LiveLink Controller on the "Tracker" Actor
Add a LiveLink controller on the second actor, and select the same camera role as what you would use for the camera:
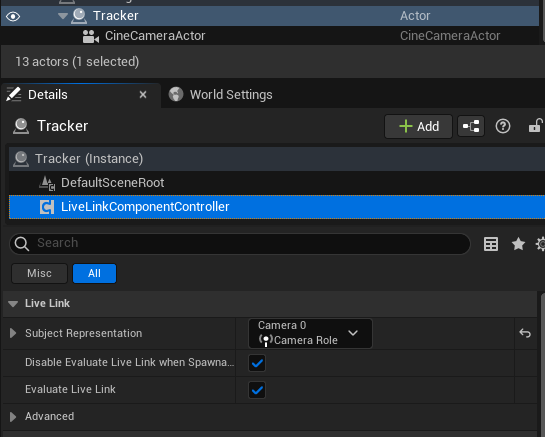
2.3. Add a Lens Component and a LiveLink Controller on the CineCamera Actor
Add a Lens Component on the CineCamera, and select the .ulens file corresponding to the same lens calibration as the one used in EZlineup:

Tip
Documentation on how to export and load this lens file format is in the EZprofile documentation
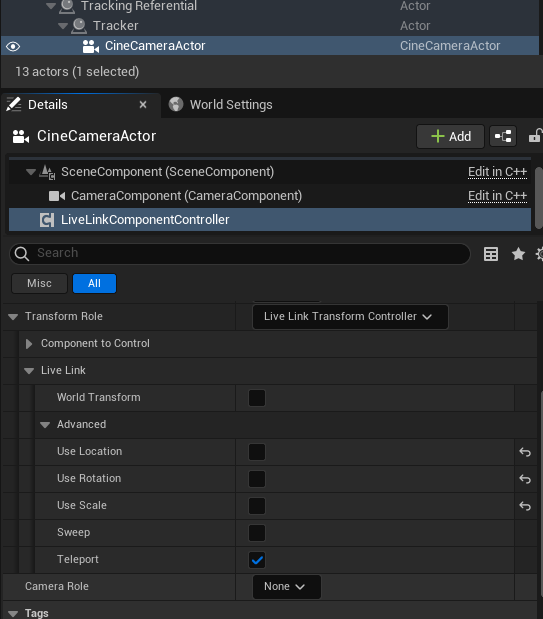
Add a LiveLink controller on the CineCamera, and select the same camera role as for the Tracker. However here, disable "Use Location", "Use Rotation" and "Use Scale", so that only lens data is taken into account:
Warning
Make sure the transform of the camera is still zero. Sometimes the livelink controller has time to write transforms before they are disabled.
3. Copy the EZlineup results
3.1. Referential Offset
Copy the values from Referential Offset Transform into the first Actor's SceneComponent:
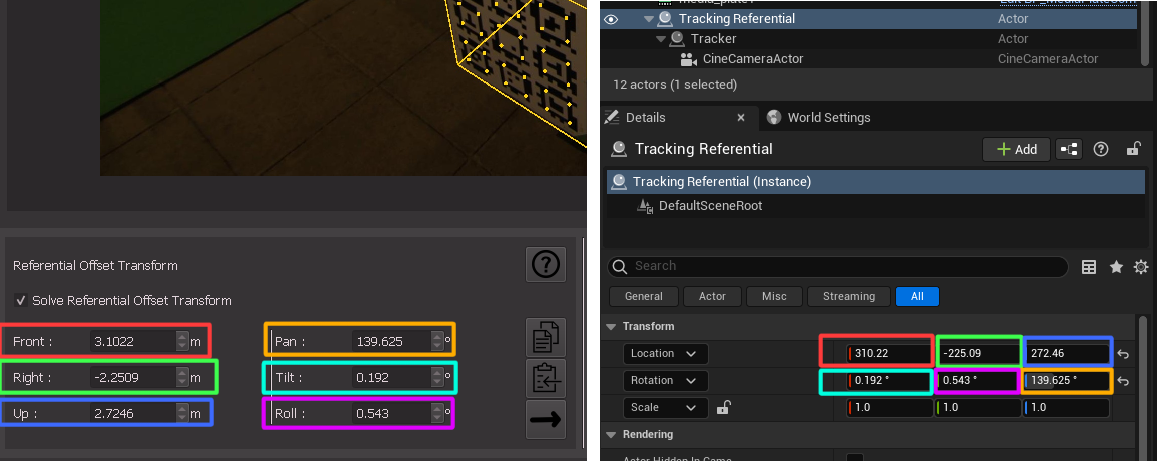
- Front -> X
- Right -> Y
- Up -> Z
- Pan -> Z
- Tilt -> Y
- Roll -> X
3.2. Tracker Offset
Copy the values from Tracker Offset Transform into the CineCameraActor's SceneComponent:
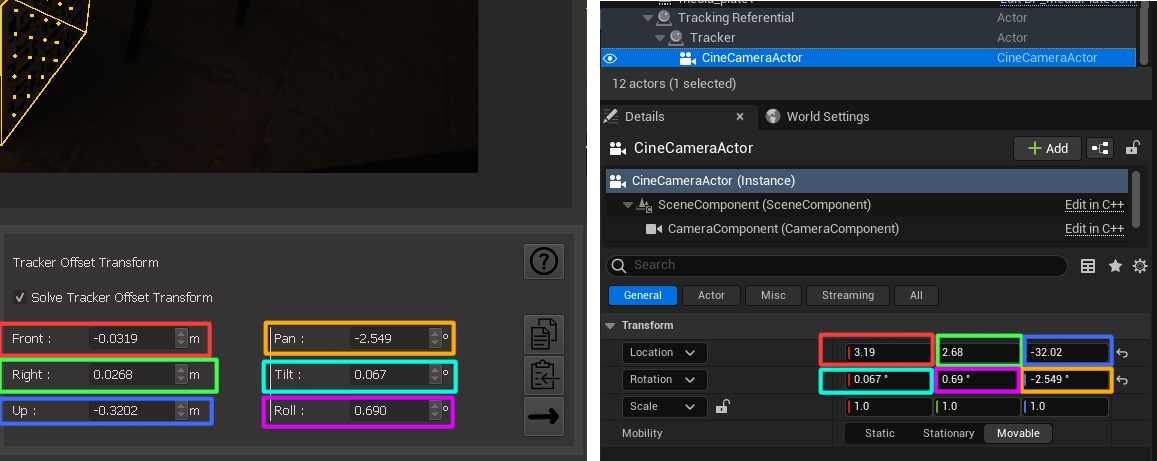
- Front -> X
- Right -> Y
- Up -> Z
- Pan -> Z
- Tilt -> Y
- Roll -> X