Export for Unreal Engine (Vanilla)
1. Export the Lens File
In the Export section, choose the target "Unreal" and press "Export Lens Files"
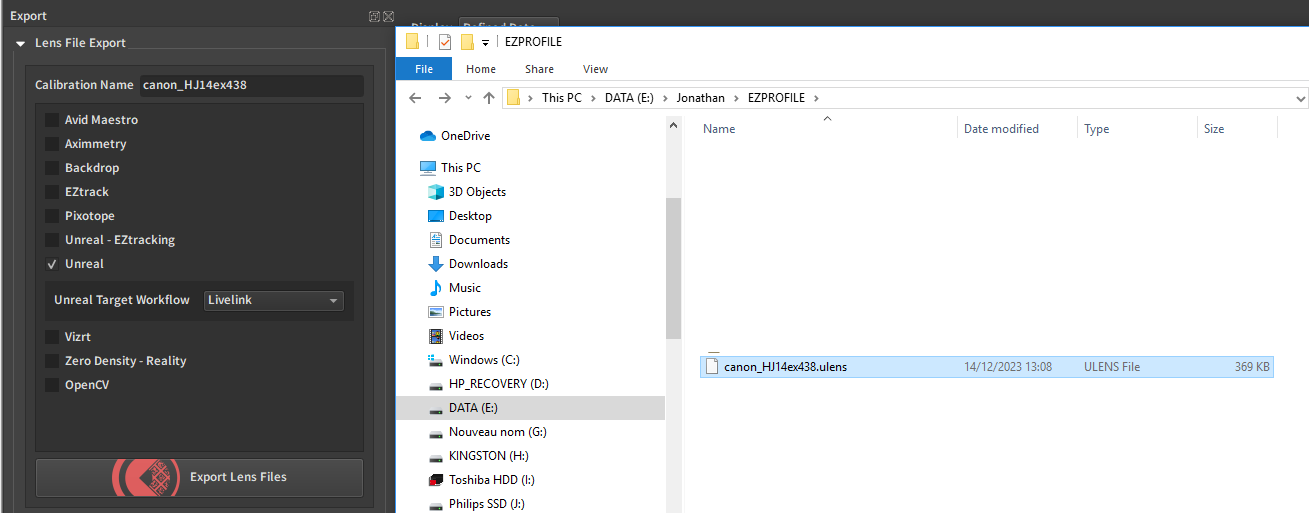
The extension is ".ulens"
2. Required Plugins
In unreal, make sure you have the following plugins enabled:
- Camera Calibration
- LiveLinkLens
- OpenCV Lens Distortion

3. Drag-and-drop in Unreal
Drag and drop the .ulens file in the content browser.

If you double-click on the lens uasset, this window will appear with all the curves already filled in:

4. Create a Lens Component in the Camera
Warning
The camera must receive the lens tracking through a Livelink component, like when using the Livelink FreeD plugin.
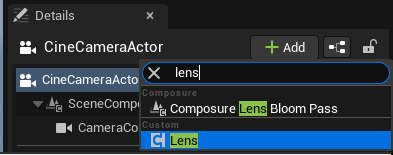
Add a "Lens" component in the Cine Camera Actor:
You can now drag and drop the lens asset in the "Lens File" slot. In addition to this, you need to activate "Apply Distortion" and override the filmback with that of the lens file, as shown below:
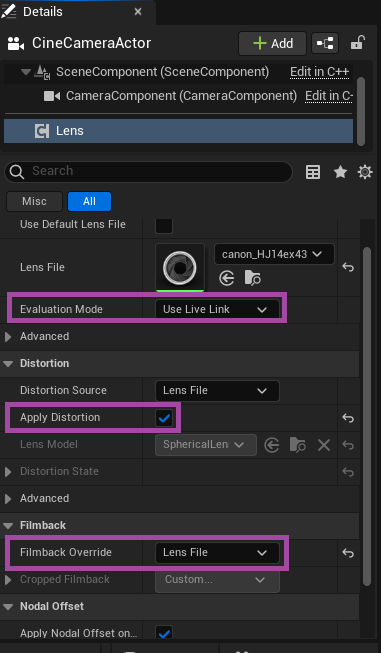
- Evaluation Mode = Use Live Link
- Distortion Source = Lens File
- Apply Distortion = True
- Filmback Override = Lens File
- Apply Nodal Offset on Tick = True
5. Buggy Nodal Offset Workaround
Apply Nodal Offset on Tick should make the camera move forward to the entrance pupil given by the lens file at each tick. However, this is only applied when the location and rotation of the livelink controller are also enabled. This is an issue when using the EZlineup with native Unreal workflow
What follows are workarounds to apply the nodal offset manually using blueprint.
Uncheck "Apply Nodal Offset on Tick"

5.1. Play Mode only
Warning
Note that while simpler, this method will only work in Play Mode.
Add this node setup into the level blueprint:
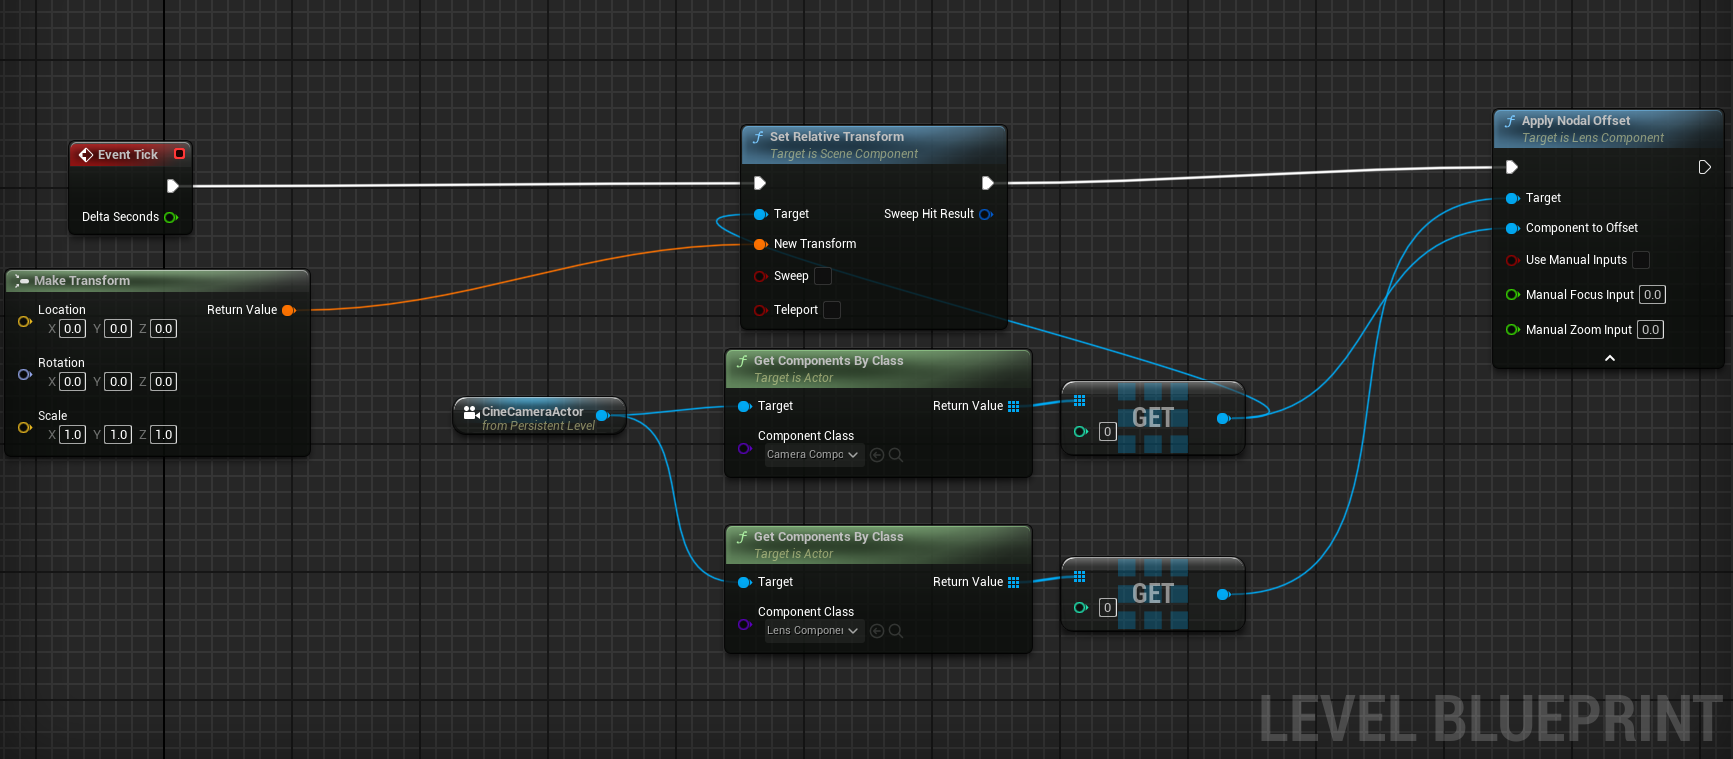
"Apply Nodal Offset" is a built-in node to move an actor component forward by the nodal offset value. An issue with it is that instead of updating the nodal offset when called at each tick, it increments the offset. So it is necessary to reset the transform of the camera component first.
5.2. Editor-compatible fix
This version is based on https://dev.epicgames.com/community/learning/tutorials/PBnR/creating-an-editor-tick-in-unreal-engine
We will port the node graph above into a custom blueprint actor and use a livelink update event to trigger it in editor mode.
Here is a premade asset of this blueprint actor: ApplyNodalOffset.uasset (Unreal 5.5.3)
5.2.1 Recreate this asset manually
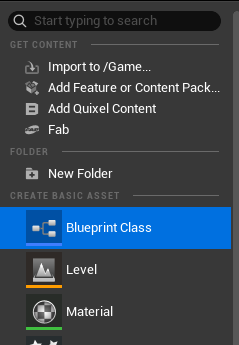
Create a new Blueprint Class in the content browser:
Select "Actor" as the parent class:
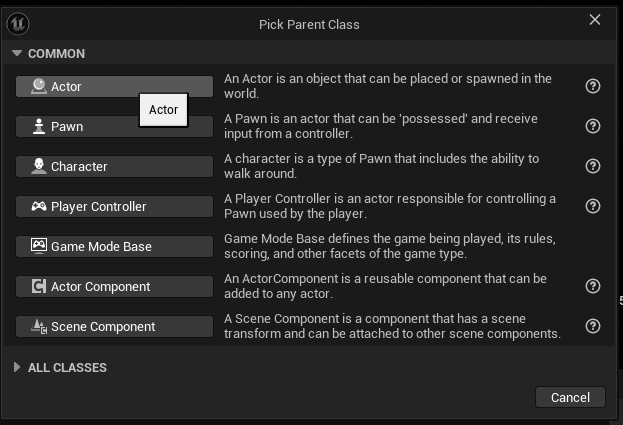
Here we rename the resulting class as "ApplyNodalOffset":

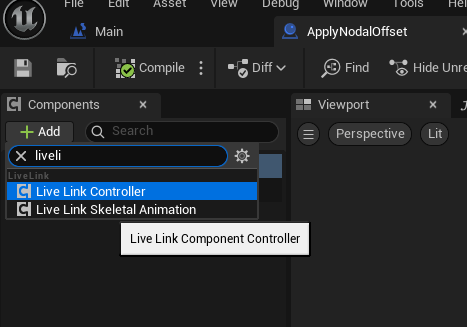
Open the blueprint. At the top-left, in the components, add a Live Link Controller:
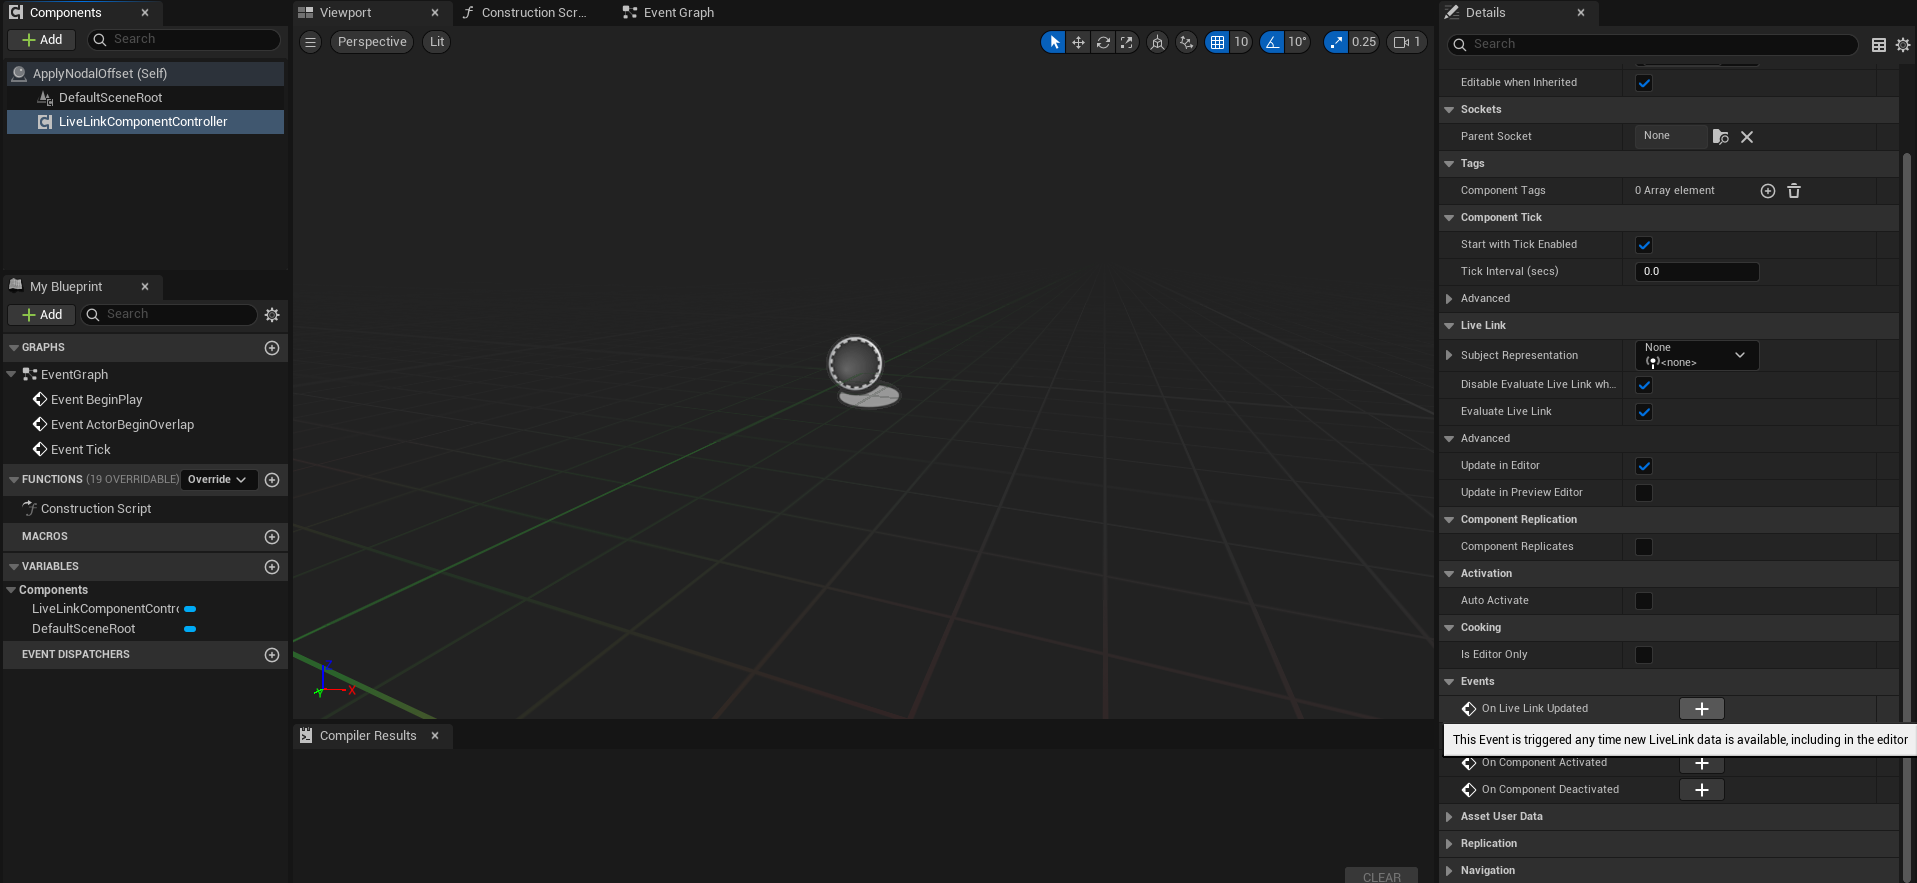
Select the Live Link Controller. In the details panel, add the "On Live Link Updated" event:
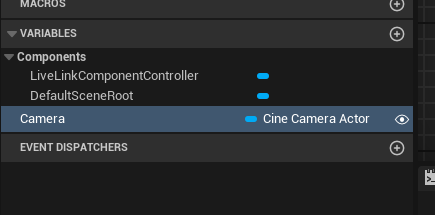
Add a new variable called "Camera" of type Cine Camera Actor. Make sure it is public so you can configure it from the actor details in the editor (little eye on the right open):
Add this in the blueprint nodegraph:
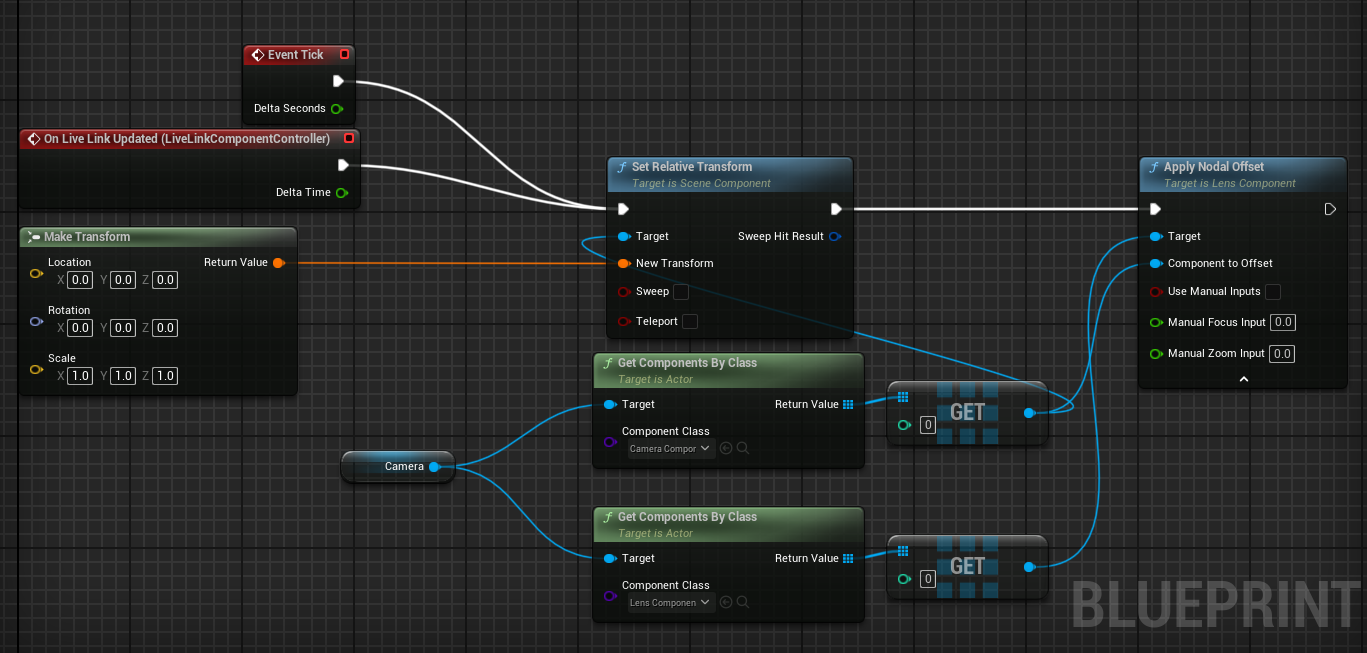
In this example we connect both the event tick and the livelink updated. Normally only the livelink updated event should be enough, even in Play Mode. The "Camera" node is created by drag-and-dropping the "Camera" variable in the graph and selecting "Get".
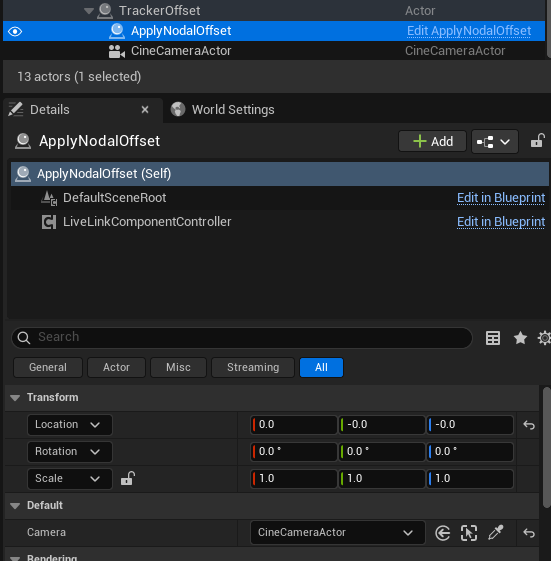
Drag and drop this asset into the scene to instanciate the ApplyNodalOffset actor. Select your CineCamera (which must have a LensComponent):
Afterward you should see the nodal offset applied in the camera's CameraComponent:
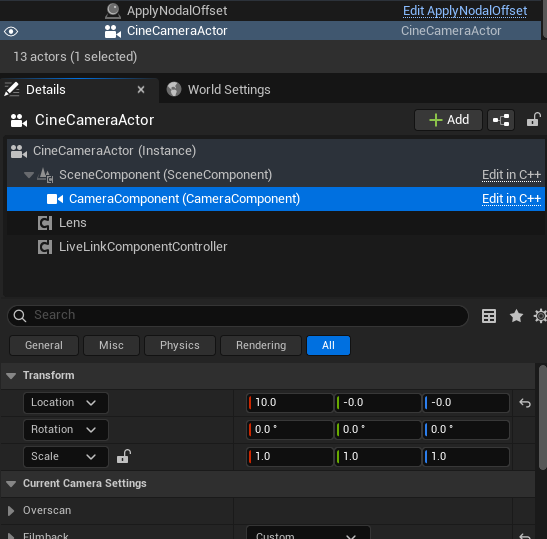
Moving the zoom and focus of your encoded lens should change that value in real-time in the editor.
If this slows down the scene, you can add an interval in the update of this actor's livelink component to update less frequently:

This interval shouldn't be higher than the period of a frame to avoid jagged zoom (in general the nodal offset changes when zooming in or out).