Configuring EZtrack for EZProfile
If you already have a tracking rig setup with eztrack or want to setup one, you can directly go to section 3. You can check how to setup EZtrack completely with the video tutorials here: EZtrack setup. If you just want to get the lens for ezprofile, read sections 1 and 2 to generate a simplified lens rig.
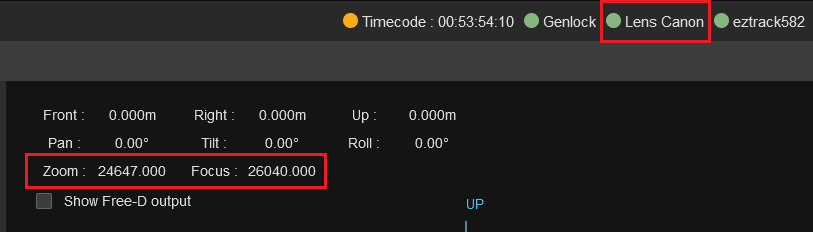
1. Connect the lens to EZtrack
See this video tutorial on how to plug a lens into Eztrack : Connect a lens to eztrack. After this the lens circle at the top of the screen should have become green and you should see the lens values moving as you change zoom/focus on the lens on the 3D view on the right even without a rig:
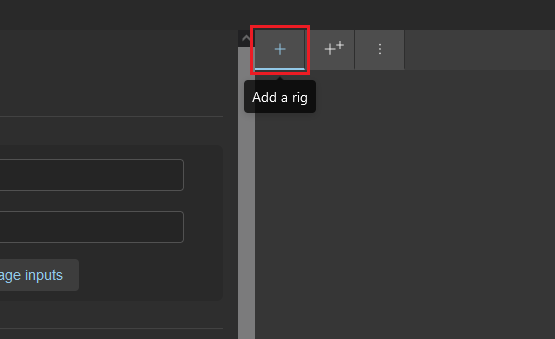
2. Create a fake rig to send lens data
You don't need position and rotation tracking for ezprofile, just the lens. Create a new rig using the plus button at the top of the screen:
This UI should appear at the bottom of the screen:
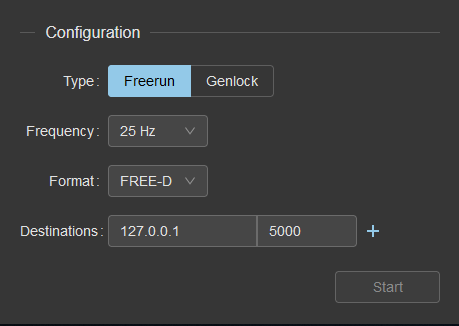
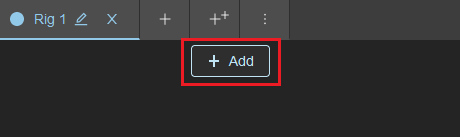
You will notice that the Start button is greyed out. To unlock it and start sending, we need to add a fake transform. Press the Add button:
You don't have to modify the values in the transform, as the positional data won't be used.
3. Send to the computer running EZprofile
3.1. Get the IP
open the cmd command line (you can open it with windows_key + R, type in "cmd"). type "ipconfig".
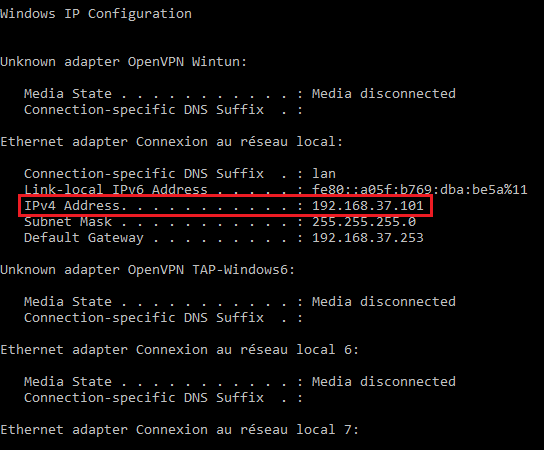
The IP should be the IPv4 one. For me it is "192.168.37.101".
3.2. Configure output in EZtrack
In Destinations enter the IP from above. Choose a port that is available on the computer running ezprofile, here I've left the default port 5000.
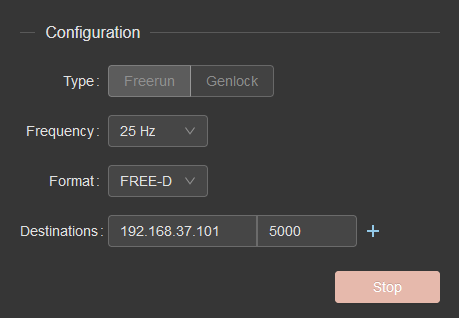
Press Start.
4. Configure the receiver in EZprofile
Put the same port in EZprofile tracking panel:
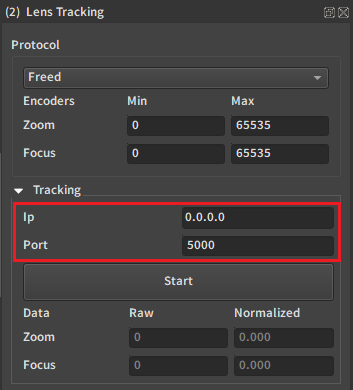
For the IP leave "0.0.0.0"
Press Start.
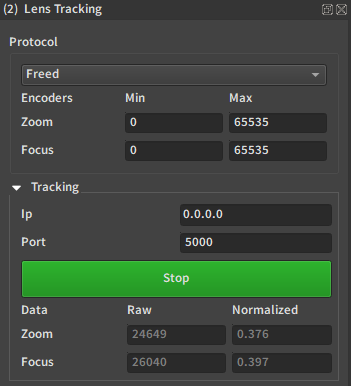
You should now see the same values as in EZtrack, check that they move when you move the controls on the lens.