Using a Remote Controller (Lighthouse)
Warning
This guide explains how to use a Lighthouse (SteamVR) controller with EZtrack as a remote for EZprofile. There is another method to do the same with a simple presentation pointer.
1. Assemble the controller
If you have a regular VR controller with A and B buttons you can skip this step. If you only have trackers you will need a special stick to access the A and B buttons.
2. Configure in EZtrack
You can check how to add a new tracker in EZtrack with this video tutorial: Add a new tracker in EZtrack.
tip
If you want, you can change the name of your tracker on the left in Lighthouse tab. You can also change the name of the rig at the top by clicking on the pen icon next to its name.
For this example, I have renamed the tracker "EZprofile Remote" and the rig "EZPROFILE REMOTE".
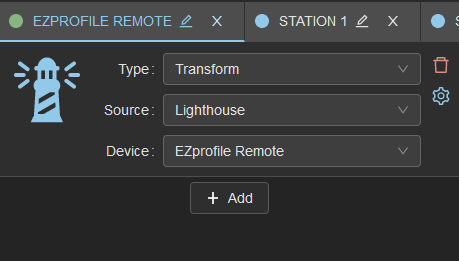
Press on the Add button. A transform will be created. Change its type to Input.
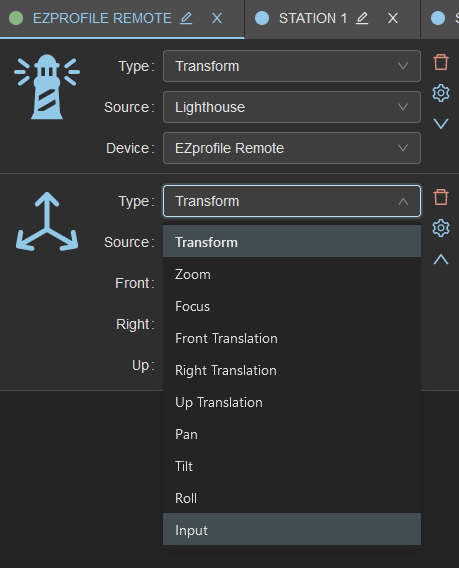
Do this again to have a second input. Make sure the device is the tracker (or controller) you intend on using. Set one of the inputs as button A and the other as button B. One of them has to be mapped to Zoom and the other to Focus.
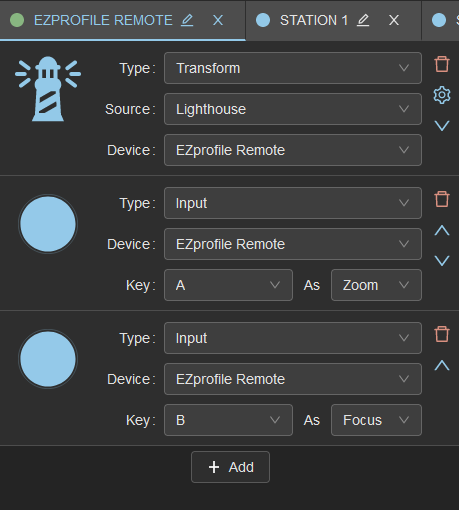
Now if you press a button, you should see the associated lens value change in the 3D view on the right.
Note
The way remote inputs are handled in EZprofile is with the zoom or focus value in FreeD. (note this is a different receiver than the lens, this will not interfere with it) it is 0 when off and 65536 when on, with a margin of detection. If you don't want to use EZtrack, you can tinker an EZprofile controller by making a FreeD sender that maps controls as described above.
Now, like in Configuring EZtrack for EZprofile 3.2, configure the output to the machine running ezprofile.
Danger
make sure you send lens tracking and remote controller messages on two different ports, otherwise they will get mixed up.
3. Configure in EZprofile
Click on the action drop-down menu to show an interface like in the image below. It is similar to the lens tracking interface from Lens Tracking network-wise. Configure it to listen to the rig you have set up in EZtrack (or your custom apparatus).
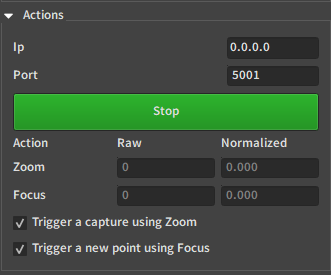
In addition there are two checkboxes:
- Trigger a capture using Zoom
- Trigger a new point using focus
The first tells that pressing on the input linked to zoom will take a new picture, and the second than the input linked to focus will create a new Z/F point in the calibration. The order can not be flipped in EZprofile, go back to EZtrack if you want to invert which button does what.