Capture
The first part of a calibration is to capture multiple pictures at different Zoom-Focus values (ie. points).
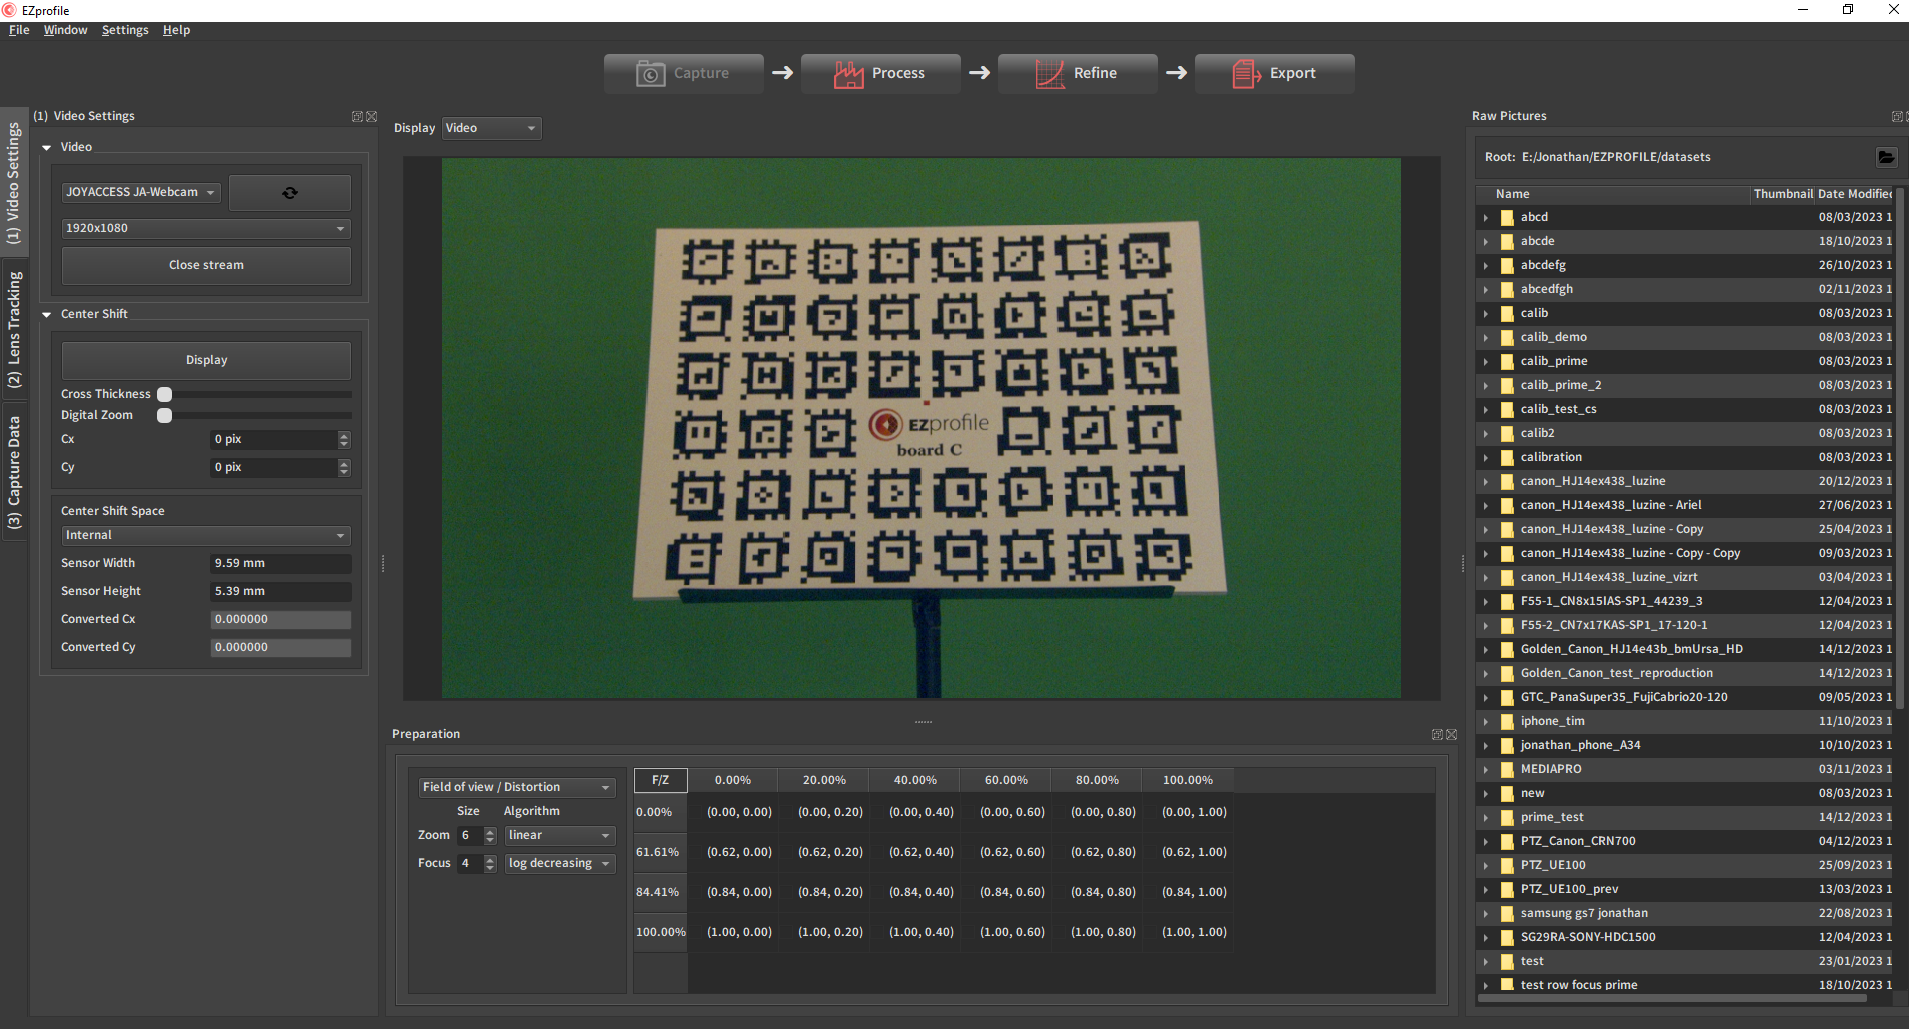
1. Video setup
- Select the video device corresponding to your input video. The refresh button updates the list of devices if you connect it while the software is running.
- Check that the resolution is the one that will be used on set.
- If the video is not displayed (black screen), toggle the button "Open/Close stream"
Detailed Page: Video Setup and Options
2. Lens Tracking
![]()
- 1. Select the protocol: FreeD or TCD for live data over the network, or Manual to specify values by hand.
Manual is intended for testing or unencoded prime lens calibration. For real-time applications, choose the FreeD input.
Warning
The following assumes a tracking system has been configured on the camera to calibrate, and it currently sends FreeD data to the computer running EZprofile on a specific port. See Setting Up EZtrack for EZprofile if necessary.
- 2. Enter the IP address of the network card receiving data on the computer running EZprofile. 0.0.0.0 listen for data on all network interfaces.
- 3. Enter the Port number on which the FreeD Data is sent.
- 4. Click Start. Look at the fields below, they should now display the current values of zoom and focus. (If not, check your network, firewall, etc)
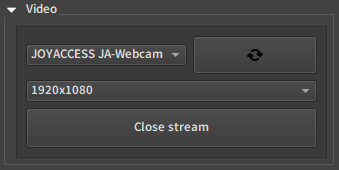
- 5. Adjust the encoders limits:
- Set the zoom to minimum on your lens and check the value displayed in EZprofile in the Raw field
- Write the same value on the Minimum Zoom Encoders field.
- Repeat this for zoom maximum, focus minimum, focus maximum
Detailed Page: Lens Tracking
Using presentation pointer as remote
Using a SteamVR controller as remote
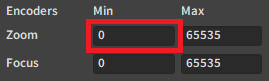
3. Check out the preparation table
This table helps the user determine the points to calibrate. The colors indicate whether the current position is close to a grid point. The warmer and brighter the closer. When the zoom and focus get within a small margin of error of a cell, the latter will get a red border.
Tip
a fast way to know that EZprofile receives tracking data is that the preparation table lights up.
There are little checkboxes in the cells. When a point is done, the corresponding cell gets automatically checked. They can be triggered manually too. Their only purpose is to help remember which points were already done.
Note
It is not mandatory to capture the points shown in the table. It is just a guide to get an uniform density of measurements and accelerate the process.
Sometimes some of the points are very hard to capture. You can avoid doing them, especially if you don't intend on going in this domain often while using the lens, or pick an easier Z/F combination near the hard one. EZprofile does not need points to be on an uniform grid to compute the interpolation.
Detailed Page: Preparation Table
4. Prepare for Calibration
Danger
If you use custom or self-printed boards, don't forget to set and select your board preset before starting a calibration. See Printing the Boards for more information.

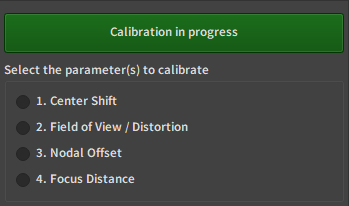
Press the blue Start Calibration button and give the informations asked by the pop up windows. If not sure, check how to Start the calibration.
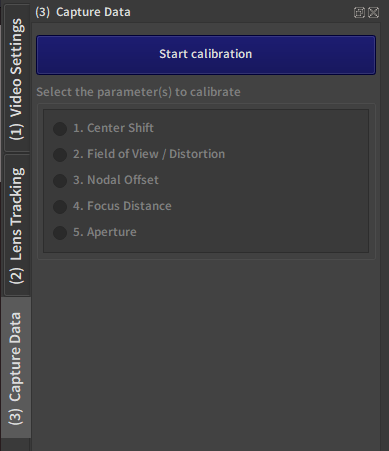
5. Capture Data
Just under the Start calibration button, a new interface is now available:
These are the 4 different methodes needed to calibrate the subset of camera intrinsics used in virtual production.
- Center Shift: uses a crosshair to find the point that sticks to a feature of the image while zooming.
- Field of View / Distortion: the methodology for estimating the field of view angle and the radial distortion solves the two together. It involves many pictures of boards.
- Nodal Offset: compares the distance to board, both estimated from the field of view and measured.
- Focus Distance: measure the distance from the sensor at which objects are crisp.
Note
See the Description of Quantities Involved for a description of each parameter.